How to remove the drum on the washing machine?
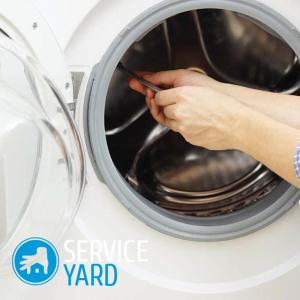
As much as we would like, but any washing machine cannot work forever. Quite often, replacing parts or simply fixing minor problems can extend the life of your homemate. Sometimes this is impossible to do without analyzing the “heart” of such a technique - the drum. Often, resorting to this method is necessary if it is necessary to replace the bearing, stuffing box or flanges. In some models, due to the lack of access to the tank from the back cover, even in order to remove foreign objects, such as a bone from a bra, you also need to go this way. Of course, it is better to turn to specialists in this case. But if you do not want to spend the amount voiced by the masters for services, or for some other reason you cannot use their help, then, having studied the detailed recommendations from this article, you will understand how to remove the drum on the washing machine and do it as efficiently as possible.
to contents ↑Before you start
Before you start repairing the drum of the washing machine:
- Disconnect the equipment from the power supply.
- Drain and pull out the drain hose.
- Close the water supply hose and disconnect it.
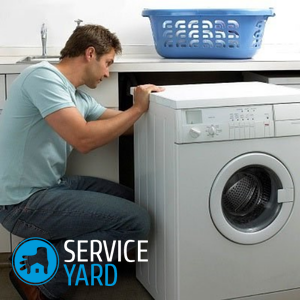
- Move the washing machine to the center of the room. You will need enough space so that you can turn the equipment back and forth.
Important! One of the problems with the breakdown of the drum of a washing machine is a constant imbalance during operation. To avoid this, you must be able to properly wash in the machine.
Even if you think that you did everything right when washing different things, an article about the right thing will be useful to youcalculating the weight of laundry for a washing machine.
Prepare the tools you may need:
- a set of Phillips and flat head screwdrivers;
- set of stars and hexagons;
- ratchet and several socket heads;
- screwdriver extension;
- screwdriver;
- pliers or pliers;
- hammer;
- wooden blocks;
- Bulgarian;
- drill;
- hacksaw for metal, if the tank is not separable.
Important! Some models are pretty easy to disassemble, and with some you'll have to sweat a lot. You do not necessarily need all these tools, but it is better to prepare them in advance so as not to stop in the middle of the process due to a missing item.
If you are going to replace some element, then it also needs to be prepared.
to contents ↑Disassemble the front-loading machine
The device device differs from the option of loading linen: frontally or horizontally. Naturally, the repair approach is different here. First, let's figure out how to remove the drum on a front-loading washing machine - this type is found in our apartments much more often.
First you need to remove the top cover of the washing machine. To do this, unscrew the two screws on the back. Pull the cover towards you and remove.
Now you should remove the front of the washing machine. For this:
- Remove the powder tray.
- Then comes the panel with buttons. Remove the bolts that secure it. Please note that some mounts may be located in the opening of the powder receptacle.
- Disconnect the control panel contacts.
- Completely remove the part of the panel with the control buttons.
Important! During the disassembly and repair of the drum of the washing machine, you will have to disconnect a lot of terminals and elements. We advise you to take photos at each stage, so that later there will be no problems with the collection of equipment.
- Remove the bottom bezel, which usually covers the outflow filter.
- Now unscrew the screws directly to the front wall.
- Now the panel is held only by the cuff - you need to remove it. The gum of the hatch is fixed with a metal clamp, at the junction of which, as a rule, there is a spring, less often - a bolt with a nut. Pull the edge of the cuff slightly toward you and look for the spring. Then pry it with a slotted screwdriver and remove. Wrap the edges of the gum in the middle of the drum.
- You can remove the front panel with the hatch. Lift it up a little and pull it towards you.
Important! The hatch lock, which is located directly on the front wall, is connected by wires to the inside of the machine. You can disconnect them by sticking your hand between the case and the panel, or completely remove the lock by unscrewing the bolts.
- Unscrew the rest of the front top panel. So that later nothing bothers you, it is better to remove this part of the wall together with the powder receiver and the water supply valve.
Now you have free access to the tank. It remains to disconnect all the elements that hold it inside the case:
- Carefully look for and disconnect the remaining wires.
- Turn off the pressure switch.
- Next, unfasten the nozzles that still hold the tank.
- Remove two counterweights from the tank.
- Remove the shock absorbers and bolts.
Now remove the tank from the springs and lay it on the floor.
Important! Premature wear of the tank and bearings often occurs due to the fact that the equipment is not installed correctly, and during operation there is an increased mechanical load. To exclude this in the future, use the information from the articles:
We disassemble the machine with vertical loading
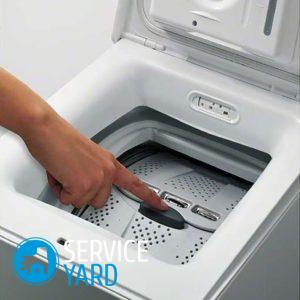
Now let's look at how to remove a drum on a top-loading washing machine. In machines of this type, the drum is mounted on flanges, and often they are the “sore” spot of these models.
What to do:
- Unscrew the screws on the side cover.
- Pull the side panel to the side, and then remove it.
- You will see a pulley, a plastic tank cap, behind which the drum is located.
- Disconnect the wires that go to the tank.
- Remove cargo fasteners.
- Unscrew all the screws in a circle around the tank cap and remove it.
- If you cannot remove the tank cap, then most likely it was still soldered in some places. In this case, you can pluck it in such places with pliers or cut off with a grinder.
Important! You can not worry if you slightly damage the tank lid or bump a little deeper than necessary, since this part is sealed along the inner edge and there is a rubber band in the middle. In the future, such minor damage will not affect the operation of the equipment.
- Remove the second part of the side panel.
- Loosen the screw holding the shaft from this side.
- Close the loading door.
- Gently pull out the tank.
How to disassemble the tank?
Before disassembling the drum of the washing machine, you need to release it from the tank. There are collapsible and non-collapsible tanks - the so-called disposable. The following actions depend on which one you got:
- If you have a collapsible tank, then dealing with it is very easy. Using a flat-blade screwdriver, simply separate the brackets that hold the two halves together.
- But if the tank is solid, then you have to tinker. In principle, the term “disposable” implies that after repair it will not be reused. But our craftsmen have learned to solve this problem.
Important! Many services refuse to deal with non-separable structures, since the issuance of a warranty for repairs in this case is possible only when replacing the tank with a new one.
Read more about when and when warranty repair of washing machines.
To get a drum from a disposable tank, you need to saw it. For this:
- Determine where the weld is located.
- Then, using a drill with a diameter of 3-4 mm, make shallow holes in the weld. The distance between the recesses is 4-5 cm.
- Now take a hacksaw and carefully cut the tank at the designated points.
- Remove the front half.
- In this case, the second part is still held on the drum due to a special wheel. Unscrew it with a screwdriver.
Important! The assembly of such a tank is carried out in the reverse order. The two parts are connected together by screws and the joint is sealed.
Twist the pulley and take out the drum
Often, it is necessary to disassemble the tank not only to remove foreign objects, but also to repair the drum of the washing machine - replacing parts, such as bearings or crosses. To get to the insides of the drum, you need to remove the pulley and remove the shaft.
The pulley is attached to the drum shaft with a nut or bolt directly in the middle. First you need to unscrew the bolt - this is a rather difficult task, since it is specially strengthened to avoid unwinding during washing. It is better to take a knob or a spanner for such work. Twist the pulley counterclockwise. To avoid scrolling, it is better to put a wooden block or a handle from the hammer.
Important! If you still can’t twist the bolt, you can heat it with a gas burner. The metal will expand and you will need less effort. However, be extremely careful.
Now you can remove the pulley by slightly swaying from side to side.
After removing the pulley, a shaft still remains in the drum. To get it:
- Screw the bolt back onto the shaft - do it all the way.
- Now, holding the tank, tap on it.
- When you notice that the shaft has left the seats, simply twist the bolt and remove it.
Important! If, in order to knock out the shaft, there is not enough light effort to avoid deformation of the “native” bolt during stronger impacts, we recommend installing a bolt of another similar size for a while.
- Remove the second part of the tank and remove the drum.
- Carefully examine the condition of the shaft under the bearing.
We get bearings and stuffing box
Oil seals and bearings are removed from the back of the tank.
It is very simple to get an epiploon. Take a screwdriver and pry it a little. Or stretch, capturing one edge with a pair of pliers.
There are always two bearings in the tank. They get one by one.
Important! In order not to return to the question of how to disassemble the drum of the washing machine in the near future, the service center masters recommend changing both bearings and the stuffing box at once.
To get the bearing:
- Take a hammer, metal bar or extension for a screwdriver.
- Tap the rod to knock out the bearing.
- Blows must be carried out in different places. At the same time, make sure that the bearing “runs” smoothly.
Important! Evaluate the cost-effectiveness of repairing your equipment. Perhaps it makes sense not to spend money on expensive parts and such difficult work if your model has already served its purpose. In this case, look for yourself a new one of our ratings:

Washing Machine Care Tips
And at the end of the article, some tips that will help extend the work of your “home laundress” and allow you to not think about how to remove the drum on the washing machine for a long time:
- After washing, be sure to leave the hatch door and powder tray open for several hours. So you not only delay the repair, but also prevent mold.
- Wipe the washing machine regularly - both outside and inside.
- Before washing, be sure to remove all contents from clothing pockets. Also, do not put things on which buttons or other small details are barely held.
- Periodically remove the powder tray and wash it thoroughly.
- If you are leaving for a long time, for example, on vacation, drain all the water from the machine by unscrewing the drain filter.
- Wash floors under the washing machine. So you provide the best grip on the surface - the machine will not “jump” during the spin cycle.
- If you place various bath accessories or other objects on the top cover, it is better to cover the surface. Do not place any sharp, breakable objects, or corrosive substances on the washing machine.
- Drain hoses and water kits should be changed every 5 years, and regularly inspected for cracks and other damage.
Stock footage
We hope that your household helpers will be faithful to you for a long time. And if, nevertheless, an incident occurs and you have to remove the drum on the washing machine, then now you can easily cope with this task.
- Rating of washing machines in quality and reliability
- Best Top-loading Washing Machines - Rating
- Rating of washing machines with dryer
- Warranty repair of washing machines
- Anti-vibration stands for the washing machine
- How to install a washing machine so that it does not jump?
- Laundry Weight for Laundry
 (No ratings yet)