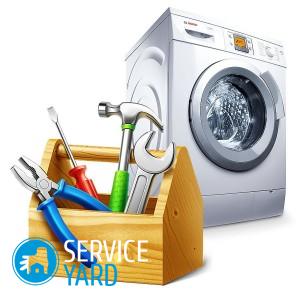
Repair of a drum of the Ariston washing machine
Replacing bearings in the washer is a rather complicated and laborious job, which requires great accuracy, time and professional skills. It is not surprising that the repair of the drum of the Ariston washing machine is sometimes extended for several days. Of course, it’s easier to call the master, but sometimes you want to carry out repairs yourself. After reading the information from this article, you can really assess your strengths, skills and abilities, and understand whether you can cope with this task.
to contents ↑Express fault diagnosis
The problem with the bearings can be identified by ear - by the appearance of extraneous sounds during operation of the unit, as well as by the following symptoms:
- After starting the wash, the motor runs, but the drum does not spin.
- Vibration during washing.
- The spinning does not work.
Essential tool
Before you repair your Ariston washing machine with your own hands - replacing a bearing or some other type of repair, prepare the tools that are useful to you:
- Pliers.
- Hammer.
- Screwdrivers with a flat and cross sting.
- A device for removing bearings.
- Metal rod.
- Carob keys.
- Sealant.
- The grease is waterproof.
- Marker for marking.
Important! Buy new oil seals or bearings in advance. If you do not know what exactly you need, make a purchase after the defective worn parts are removed.
Before disassembling a household appliance, be sure to carefully read the instructions for it, and also learn aboutwarranty repair of the washing machine.

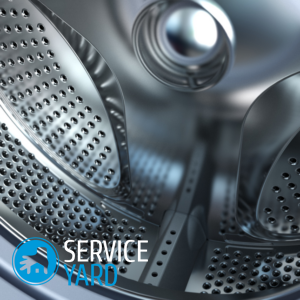
Tank extraction
If you disassemble the unit for repair, be sure to photograph each step. Disassemble the Ariston front-loading washer in this order:
- Unscrew the plastic cover on the back of the case.
- Remove the bolts that hold the top cover, remove the cover.
- Remove the back wall from the housing.
- Loosen the clamp holding the nozzle on the washing tub. Remove the nozzle.
- Remove the wire chip from the motor.
- Remove the drive belt.
- Loosen the bolts (2 pcs.) Holding the motor.
- Press the bolts lightly while holding the engine, then unscrew them to the end. Remove the motor from the washer.
- Disconnect the contacts from the heater. The latter is under the tank.
- Disconnect the sensors.
- Remove the powder compartment.
- Locate the bolts holding the front panel directly under the detergent drawer. Remove these bolts.
- Remove 2 bolts at the top. They also hold the control panel.
- Disconnect the control panel.
- Remove the rubber cuff from the drum.
- Remove the bottom panel and unscrew all the bolts holding the front wall of the washer.
- Remove the front of the housing.
- Unscrew and disconnect the counterweights.
- Disconnect the filler pipe from the tank.
- Remove the hose connecting the pressure switch (water level sensor).
- Remove the detergent drawer.
- Unscrew the shock absorbers.
- Using a flat-blade screwdriver, remove the spring clips on which the tank is suspended.
- Check if everything is disconnected from the tank. If so, remove it from the washer.

Replacement process
Repair of the bearing of the Ariston washing machine, or rather, its replacement, is the next stage of repair:
- Remove the pulley. This is quite difficult, since a screw paste is used when screwing the pulley.
Important! You can help yourself with a hammer and chisel, you can use the holder and a bat of size T40. Do not forget to mark the correct position of the pulley with a marker, so as not to make a mistake during reassembly.
- After the pulley is removed, you will see the shaft and the outer bearing. Using a wooden block and a hammer, knock the shaft out of the drum and tank.
Important! If you can’t knock out the shaft, screw an unnecessary bolt into it and strike it.
- Divide the tank into 2 parts. The easiest way is to disassemble the models fastened together by means of bolts.
- When the washing drum is released from the tank, inspect how worn the shaft sleeve is, replace the worn bearing with a working one.
- If the slightest backlash is observed, the shaft together with the spider must also be replaced.
Important! With an integral tank is much more complicated. It has to be cut into 2 parts.
Now we are doing bearings. Here the algorithm is as follows:
- Knock out the outer bearing using a hammer and a metal rod. Knock out the bearing in a circle.
- After the work is finished, turn the tank over and knock out the bearing on the opposite side. The principle is the same.
- Remove the stuffing box with the liner.
Important! It is advisable to use a special universal device for removing bearings.
- After the bearings are removed, clean the hole for their mounting from dirt and rust using WD-40 fluid. After that, coat the hole with lithol grease.
- Mount the liners, with the inner one first. Put a stuffing box on the bearing, grease the structure with a grease with a waterproof effect. Mount the external bearing in the same way.
- Next - using the available photos, carry out the assembly strictly in reverse order.
Stock footage
Self-repair of the drum of the Ariston washing machine is a rather complicated matter. Therefore, if the process seemed prohibitive to you, contact a service center.
 (No ratings yet)