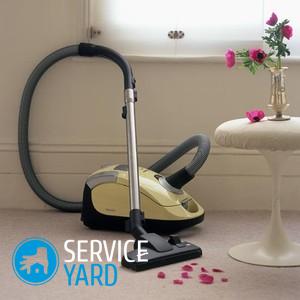
DIY vacuum cleaner repair
A vacuum cleaner is deservedly considered the most popular item from household appliances. Most homeowners today can not imagine their life without a vacuum cleaner, because it significantly saves time, and also helps to keep housing in order and clean. Do-it-yourself repair of a vacuum cleaner, like the rest of household appliances, is a common practice, because all appliances have a sad tendency to break. The cause of the breakdown, as a rule, is the wear of parts, as well as the destruction of mechanisms. But a breakdown of the vacuum cleaner does not always mean that it is necessary to purchase a new one, because it is quite possible to repair this equipment with your own hands.
to contents ↑Diagnostics of malfunctions:
- As a rule, the reason that your vacuum cleaner is out of order is a motor breakdown. Such a breakdown occurs in almost all models and brands of the device, regardless of the manufacturer. According to certain signs and features of the device, you can diagnose a malfunction and try to repair the vacuum cleaner with your own hands.
Important! The main and first sign of malfunctioning of the engine is a strong hum, as well as the appearance of a dust cloud during the operation of the device.
- Insufficient suction force or complete absence indicates a hose breakage. Another important sign that the tightness of the hose was broken is the weak and quiet operation of the device. In this case, the situation is much simpler - read how to repair a vacuum cleaner hose do it yourself.
Important! In addition to breakdown, the receiving brush may also be damaged in the corrugation.
- Low suction speeds, as well as a drop in operating speeds, are caused by bearing failure. The evidence that these components are out of order is the periodic restoration of work to normal mode.
- Excessive hum during good operation indicates that the engine is out of order. In most cases, malfunctions in the motor affect the suction power of the air flow.
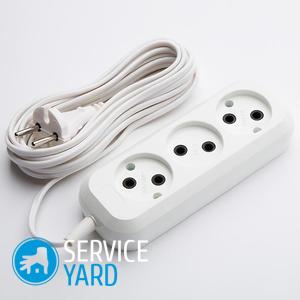
to contents ↑Important! Often the cause of problems with household appliances and its failure are voltage drops in the electrical network. To rule out this factor later, find out which is better to choose a surge protector for household appliances.
Vacuum cleaner disassembly instructions
Regardless of what the cause of the malfunction is, you need to know how to disassemble the device in order to repair the vacuum cleaner with your own hands:
- Remove the sealing grill located directly under the dust cover. This cover is fastened with two screws or other threaded connections. It is necessary to unscrew the screws with a screwdriver with the required cross-section, clockwise.
- After you remove the sealing grill, disconnect the control unit, as well as the dust collector cover.
- Depending on the model and configuration of the vacuum cleaner, the dust collector is either simply removed or unscrewed. Under the dust collector there is a garbage collection system, under which the housing is connected directly to the engine.
- To get to the motor, separate the housing from the base of the device.
Important! In certain models, this becomes realizable only after removing the secret screw, which is hidden directly in the handle.
- The engine itself is protected by a special rag pad, which is attached directly to the inlet of the intake hose. Remove the gasket and clean it; if necessary, you can replace the gasket with a new one.
- Remove power wires from the engine. To remove the wires, you will be forced to unscrew the screw clamps.
Most common malfunctions
The first thing that an experienced master will do, regardless of the manufacturer's company (Bosch, LG, Electrolux, Rainbow), will check the bearing pairs: upper, lower. Bearings are responsible for the performance of the motor. In addition to bearings, it is also important to check the integrity of the armature and motor brushes.
Good sucks, but badly collects garbage:
- Incorrect roller position. It is necessary to check whether the roller height is set correctly to the surface being cleaned.
- The brush was worn out. Inspect the brush itself and check the length of the bristles on the roller itself. If the wear has exceeded the norm, then replace the brush roller with a new one.
The brush roller does not rotate:
- The belt is torn. Disassemble the vacuum cleaner, and then replace the belt with a new one that exactly fits your vacuum cleaner.
- The roller bearings are jammed. Remove the brush roller, and then remove the end caps. At each end, check for hair or thread on bearings.
There was a smell of burned rubber:
- Belt slips. Check the force with which the belt is pulled. If the belt is loose, replace it with a new one.
- Check your bearings for ease of rotation of the brush roller. If it rotates tight, replace or lubricate.
The vacuum cleaner does not turn on:
- The plug is not plugged in. Check if the plug is fully inserted into your outlet. And also you should make sure that there is voltage directly in the outlet.
- No electricity. Check the power panel, often enough you can see a broken machine or fuses that have burned down.
- The plug or fuse is defective. Check that the plug is connected correctly, as well as the fuse that is built into the plug, if equipped.
- An open power cord. Be sure to check the power cord, to do this, disassemble the vacuum cleaner, find a place for the electrical connection of the end of the cord and ring its conductors for a break. Replace it if necessary.
to contents ↑Important! If the problems turned out to be very serious and the repair at a price will come out approximately as much as the purchase of new equipment, it makes sense to go the second way. And to make it easier for you to choose, we suggest that you familiarize yourself with the publications, which are described in detail:
Stock footage
Damage to home appliances is a common thing, especially if you do not change it so often. Therefore, an understanding of what can fail and how to restore a particular part is necessary for each owner. In this article, we helped you deal with the problem of repairing a vacuum cleaner, so we hope your cleaning assistant will serve you for a long time.
 (No ratings yet)