

Cleaning after repair
Repair is a serious matter. The interior is changing, new objects and materials appear in the apartment, and most importantly - a huge amount of garbage is formed. You probably already got rid of part of it, but you still have to bring the floors in a decent appearance, and the windows. In short, cleaning after repair is not as easy as it seems. But you will greatly simplify your life if you do it in a certain sequence. Which one? We’ll talk about this now.
to contents ↑Front of work
General cleaning after repair consists of several stages. You have to:
- to collect and take out small garbage;
- take out bulky garbage;
- remove stains from the floor, window sills, walls;
- wash windows, doors and batteries;
- remove building dust;
- put in order plumbing and tiles;
- bring the final gloss.
Important! It is possible that you will need construction tools, solvents and other stain removers, not to mention conventional detergents. In this case, the solvents must be selected exactly under the stain that you are going to remove, and in accordance with the materials. Otherwise, in one awkward movement, you risk ruining the whole thing.
You can do everything without unnecessary nervous expenses, given the following tips:
- Do not try to do everything at once - it’s better to highlight a few evenings.
- Do not start the general cleaning from living rooms - it is better to first clean up the kitchen, bathroom and corridor, and only then take on the living room, bedroom and children's room.
But do not turn to professionals?
If you are afraid of the amount of work or you are not sure that you will be able to allocate enough time, contact a cleaning company.
The advantages of such cleaning after repair are obvious:
- while professionals clean your walls, you can safely do something else;
- company employees will come at a time convenient for you - when you will be at home, or vice versa - when no one is in the apartment;
- in a reputable company there are both suitable tools and the necessary materials, and most importantly, professionals know how to use all this;
- few people will do the cleaning much faster than one or two.
How does professional cleaning work?
Cleaning companies offer their customers professional cleaning after repairing not only apartments, but also detached houses and offices.
After repair, specialists:
- they will take out the garbage and even take it out;
- remove dust;
- clean the plumbing and glass;
- clean radiators;
- wash the doors;
- clean floors, walls and ceiling;
- wash the windows.
In a word, in the list of services you will find everything that is required after the repair is completed.
to contents ↑Important! There is only one drawback of professional general cleaning after repair - it can be too expensive. Of course, after-repair cleaning a modest one-room apartment will cost much cheaper than if you had to put in order a huge cottage, but still have to spend a lot of money.
Where to begin? - Of course, from the trash!
The theater begins with a hanger, and the general cleaning of the apartment after repair - with the collection of garbage. This is understandable, because all these cans, boards, bottles terribly interfere.
Before grabbing on them, take care of safety:
- Put on something old, which is not a pity, cover your head.You will have to bother with dust and solvents, but it is better to do this in old clothes that can be immediately discarded.
- Remember to wear shoes, preferably with thick soles. A thick sole is needed because there may be nails, needles, paper clips, or even construction tools on the floor, which can be easily injured.
- Put on gloves. Gloves are needed for the same reason as specific shoes. In addition, some of the substances you have to tinker with are corroding your hands.
- It is better to take garbage bags more tightly. Thin polyethylene in this case will be a poor helper, larger paper bags are more suitable. In an extreme case, you can glue them yourself if the wallpaper remains.
Important! The volume of packages depends on the specific conditions. If you take out the garbage in a container in the yard - a large bag is convenient, so that you do not have to run back and forth again. But such a bag may not fit into the garbage chute, therefore it is better to take a few small ones. And of course, you should not leave garbage in the porch or near the house.
Before you put the garbage in the bag, look at what fell into your hands. Among the boards and trimmings of wallpaper may be the necessary things - for example, tools. They, of course, should be removed, but all kinds of residual materials should be discarded immediately. You will never use them anyway, so why keep it?
What to do with bulky garbage?
As a rule, large garbage is thrown away before or after repairs. But sometimes he still remains until the general cleaning. Leaving it at the entrance is not worth it - the communal service, of course, will have to remove it, but in general it is not obliged to do it for free. Garbage can stand for several weeks, or even months, overgrown with bags of waste.
It is best to contact the utility company that serves your home and make an application for removal.
to contents ↑Important! This is a paid service, but the price is usually low.
We carry out “diagnostics”
Having liberated the field of activity, go around the entire apartment. See where the spots are and which ones. Most often left:
- paint spots;
- traces of grout;
- putty stains;
- lime dust.
Literally everything should be inspected, because the repair marks can be seen:
- on the floor;
- on the walls;
- on the windowsills;
- on the ceiling;
- on tile;
- at the door.
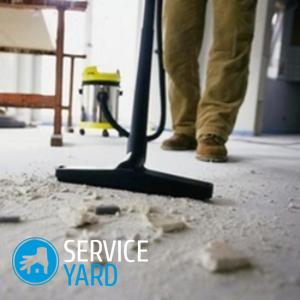
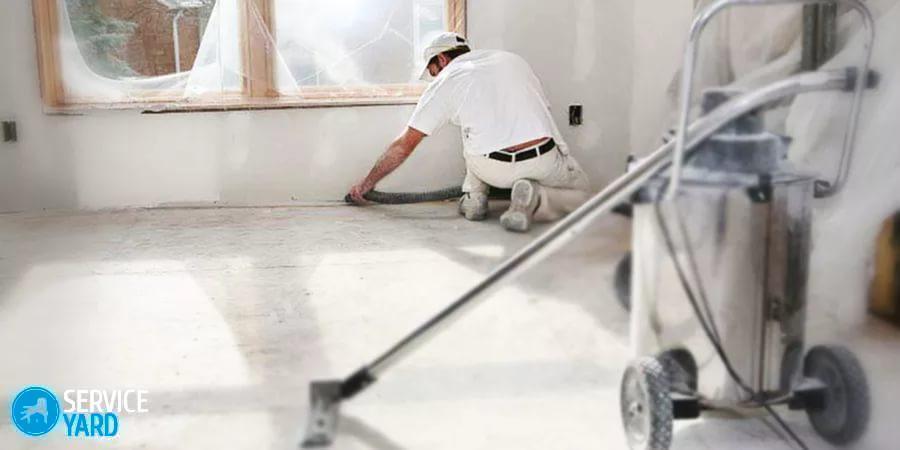
Remove dust
Building dust is a harmful and insidious thing. Not only does she have to breathe, but she also conceals spots. Therefore, you must get rid of it as soon as possible. This will be the first stage of cleaning after repair.
Dust can be removed:
- manually;
- with a powerful washing vacuum cleaner.
Important! What definitely should not be done is to try to suck the dust during cleaning after repair into a regular vacuum cleaner. After that, he will not live very long, and there will be little sense from such actions. The washing unit is much more suitable, but it must be powerful, with a large tank and good filters.
 If you intend to remove dust manually:
- Take care of a good rag.
- Several universal microfiber wipes will be just right.
Important! A cotton rag in this situation is not an assistant, you will be busy with it for a very long time, because the dust must be removed literally from everywhere.
Building dust accumulates unevenly. Therefore, pay special attention when cleaning after repair:
- crevices in the floor, if any;
- the joints of the laminate panels;
- areas along the baseboards;
- corners.
to contents ↑Important! So that after the repair you don’t have to bother with furniture for a long time, cover it with plastic or paper before starting work.
We clean the floor
Oddly enough, the hardest thing is to remove building dust from the floor. The most moody material in this sense is laminate. Particles of cement and other contaminants are removed from the parquet, especially polished and painted plank floors.
to contents ↑Important! Linoleum and laminate cannot be cleaned with hard brushes.Such coatings are best slightly moistened (but not very much - not all types of laminate can tolerate water well). After the surface has dried, you need to walk on it with a washing vacuum cleaner with a soft nozzle.
Remove stains
Care should be taken of the solvent, of course, even before the repair, especially since traces of paint are much easier to remove if they have just appeared. But even at the moment when the construction work is completed, it’s not too late - you probably remember what paint you bought and where. Maybe you even kept the check. So for a solvent it is best to go to the same store, show the sales assistant what paint you took, and ask for a solvent for it, so that the cleaning after repair is completed as quickly as possible.
Important! Do not forget to indicate which surface you are going to clean.
Using tools at hand is risky, but sometimes there is simply no other way. To remove stains of paint you may need:
- kerosene;
- turpentine;
- acetone;
- acetic acid.
Important! Before you clean off the stain, try applying the product in some corner where no one will notice the damaged coating, or on a piece of linoleum.
Features of the use of improvised tools during general cleaning after repair:
- Acetic acid, turpentine or acetone will not cause harm to the material.
- Paint is removed from the floor with denatured alcohol.
- Other spots may remain - for example, from masking tape. In this case, vegetable oil will help out.
- Greasy traces of laminate flooring and parquet perfectly removes talc. Turpentine is also suitable in such a situation.
to contents ↑Important! When using solvent, it is necessary to ventilate the room well.
We clean a tile
Paint is easily removed from the tile. Solvents do not harm this material, so you can try any. But with the remains of cement mortar will have to tinker. Grout, of course, is best removed immediately before it hardens. You will need:
- blade;
- chisel.
Important! No chemical methods have yet been invented for hardening cement. Excess can only be removed mechanically, that is, they just need to be picked up with a smooth thin blade or a chisel. In this case, you have to act very carefully, because the tile can be scratched.
Calcareous traces
Traces of lime on ceramic tiles are quite common. The nasty white coating cannot be washed off with plain water - it will certainly appear again as soon as the surface dries. Therefore, in order for the cleaning after repair to be successful the first time, prepare:
- food vinegar;
- vegetable oil;
- a rag.
To get started, remove dust from the tile - with a vacuum cleaner or a rag. Preparing a solution for further cleaning is easy. The exact dosage is not particularly important, although it is hardly worth wiping the tile with undiluted vegetable oil.
Option 1
For 1 liter of water, take 0.5 cups of 9% vinegar. Make a solution and wipe the tile with it. Then wash the surface with soapy water.
Option 2
Add 1 cup of sunflower oil to 1 liter of water and mix. Then, as in the first case, wash the tile with soapy water.
Important! Vinegar and vegetable oil should not fall between the seams.
Option 3
In the hardware store you can also find special foam for tiles, with which cleaning after repair will become much easier. It will cost more than vinegar or vegetable oil, but the costs are worth it.
Important! Such a foam perfectly launders tiles and ceramics, easily copes with traces of silicone sealant or glue.
Option 4
Liquid ammonia copes well with limescale. It should be quite a bit - a few drops per liter of water. And then - as with vinegar: wipe each tile separately, and then properly wash the wall.
to contents ↑My windows
No cleaning after repair is complete without cleaning the windows. To do this, you will need a special mop with a soft nozzle and a retractable handle. First, carefully inspect the glass and profile - they often leave traces of paint.It is better not to try to clean it with a blade, but to remove it with a solvent.
In all other respects, washing windows after repair is no different from ordinary:
- Wash the profile - if there are no spots on it, just wipe it off.
- Wash the glass from the outside.
- Wash the inside surfaces.
Useful Tips:
- Glasses need a soft rag, as well as paper towels.
- To make the glass shine, add a few drops of ammonia to the water.
- You can buy a wiper in a hardware store, it costs a lot, but how to use it is indicated on the packaging.
- You need to wash the glass surface from top to bottom, with plenty of water. Wipe immediately with a paper towel, then there will be no stains.
My door
Doors in the apartment can be:
- wooden;
- from plastic;
- made of plastic with glass.
There are usually no problems with wooden doors - they can be washed by any means, no solvent will harm them. For plastic and glass there are special detergents, but ammonia, for example, is perfect.
to contents ↑We clean the plumbing
If you changed it, only traces of repair could remain on it:
- Remove paint residues with solvent.
- Traces of cement, if suddenly they are found, remove with a blade.
- Remove lime dust in the same way as with tiles.
- Wash the sink, toilet bowl and bathtub with the help of special plumbing products.
Brilliance
The stains have disappeared, the windows are shining, the bath is sparkling, the doors are as good as new. There is very little left so that the cleaning after repair is successfully completed:
- Wipe down chandeliers and other fixtures.
- Carefully process the furniture - vacuum the soft surfaces, wipe the backs, handles and the rest.
- Wipe objects of an irregular shape especially carefully so that no dust remains in any corner.
- Wipe the floor again - the washing vacuum cleaner is no longer needed, just a damp cloth.
Stock footage
After such cleaning, it’s nice to go into the apartment. A lot of work and time has been spent, but the efforts are worth it.
- How to choose a vacuum cleaner taking into account the characteristics of the house and coatings?
- What to look for when choosing a water delivery
- How to quickly create comfort at home - tips for housewives
- How to choose the perfect TV - useful tips
- What to look for when choosing blinds
- What should be running shoes?
- What useful things can you buy in a hardware store
- Iphone 11 pro max review
- Than iPhone is better than Android smartphones
 (No ratings yet)