

Enamel recovery bath
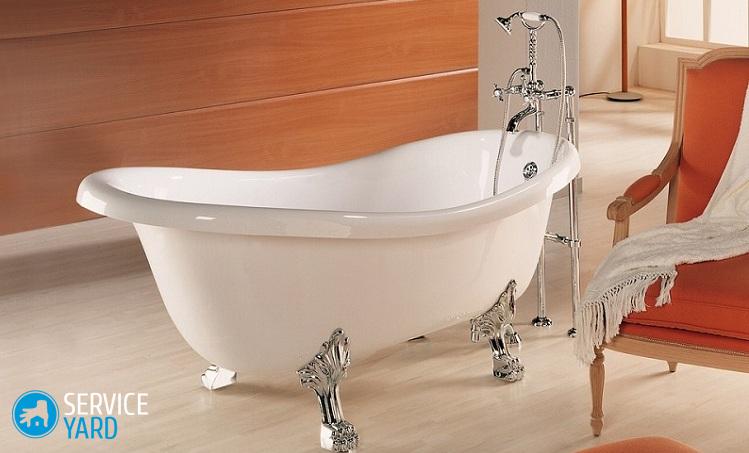
For many decades, such a shockproof, wear-resistant and durable plumbing product as a cast-iron bathtub has been used as a container for taking a bath and washing. Previously, these items simply did not have any worthy alternative. But today all construction stores offer a huge selection of various acrylic and steel models, which are quite popular. Nevertheless, cast iron always wins against other products due to its remarkable performance properties, even though it is so expensive. But after ten years of use, the surface of the material begins to turn yellow and becomes covered with small cracks, so restoring the enamel of the bath in such cases is a fairly relevant procedure. Today we learn about the features and basic technologies for implementing this procedure.
to contents ↑The main properties of the cast iron bath
Today, such bathtubs are truly the most popular due to their many properties and excellent characteristics. Naturally, they need appropriate care, and often the restoration of a cast-iron bathtub is one single solution.
Important! These products are manufactured using the casting method. This material in itself is complex in terms of processing, because for all its density and hardness it is quite fragile. The most difficulties arise in the process of giving the alloy a curved or rounded shape, which is why the model and size range of these products is not as large as customers would like.
The indisputable advantages of cast-iron baths are:
- Wear resistance. Cast iron washing tanks are able to withstand a fairly long service life, more than 50 years. Throughout this period, their strength remains at the original level. Enamel will deteriorate much earlier, but if the bath is repaired in time, it can be completely put in order.
- Low noise. The walls of such a bath reach a width of 8 mm, which is why they isolate sound well. When water is drawn into the container, the user does not experience any particular discomfort.
- Well repairable. You can even restore the enamel of the bath with your own hands. Work is done by enameling, installing an acrylic liner or filling with acrylic.
- Slow cooling. This material has a low level of thermal conductivity, and precisely because of this, the water inside the tank remains warm for a long time.
Enamel Damage Features
Enamel applied at the factory to the surface of a cast-iron bath is considered quite reliable and wear-resistant. But over time, it deteriorates due to too active operation, even if the manufacturer's recommendations are followed. Do-it-yourself enameling a bathtub is the best option for restoring the top coating of cast iron. After a certain period of time, the following defects may appear inside the bath:
- Yellowness. Gradually, snow-white enamel acquires a disgusting yellowish tint, negatively affecting its appearance. This is due to constant contact with water with a high iron content.
- Scuffs.Due to the use of abrasive cleaners and too hard brushes, scuffs often appear on the surface of the bathtubs.
- Chips. Minor damage to the enamel occurs as a result of accidental falling into the bath of heavy objects. Point impacts of medium strength cause the enamel to peel off of cast iron.
- Cracks. Cracks appear on enamel due to aggravation by mechanical loads and temperature changes.
Reasons for the restoration of cast-iron bathtubs
Most often, people begin to think about how to restore a bath for the most common reasons:
- The financial issue. Favorite old bathtub has lost its appearance, but you can’t afford the purchase of new plumbing in the near future.
- Temporary and rental housing. When a person rents an apartment for some time or plans to rent it out, of course, it makes no sense to spend money on a new bath.
- Special layout. It happens that the removal and dismantling of the old bath is simply impossible. Of course, you can try to break it, but it's better to repair it all the same.
Rules for preparing the bath for restoration
Before you restore a bath, you need to prepare its surface properly, otherwise you cannot achieve a good result. Preparation takes place in several stages:
- Rust removal. It is recommended to process the surface with gentle solutions of acetic or oxalic acid. They must be applied and maintained for half an hour, and then washed off. If rust remains after this, cleaning will have to be done mechanically.
- Grinding. Immediately after removing the rust, the bath is sanded; a drill, grinder or sandpaper is used for this.
- Cracks and deep chips. These areas are overwritten with automotive putty, then polished additionally.
- Degreasing. For this, baking soda or special products are most often used, which must be washed off with hot water after treatment.
Once the bath is completely dry:
- It is necessary to remove the drain and overflow. Down under the drain put a container where the paint will drain.
- Sand and fine dust should be removed with a vacuum cleaner.
- All surfaces adjacent to the bathtub must be glued with tape.
- Coating the surface with acrylic or epoxy enamel provides for the mandatory application of a primer.
The most popular cast iron bath restoration methods
Most often in our time they repair a cast-iron bathtub with enamel, pouring acrylic or installing an acrylic liner. Restoration by one method or another should be done only after the completion of the repair work so as not to damage the updated layer. And now we’ll take a closer look at each method separately.
Enameling a cast-iron bathtub at home
This is the most affordable and easy-to-use enamel recovery option. For staining, you can use classic epoxy enamel or other more expensive and effective paint.
Important! Diluted epoxy mixtures are quite toxic and flammable, which is why coating the surface with enamel of this nature necessarily involves the use of protective equipment - rubber gloves and a respirator.
How to apply enamel on a cast-iron bath:
- It is applied with a natural brush or terry roller.
- You need to start from the sides to the bottom, while it is necessary to ensure that the paint lies in an even layer, thinly.
- When the bath is already painted on the sides, you can proceed to the bottom. Where the layer is too thick, a little smear of the paint.
- Apply epoxy enamel in three layers, then wait 15 minutes and check for smudges.
- The bath will completely dry out only after a few days, but experts recommend waiting at least five days.
- After drying, it is necessary to polish the surface with a flannel rag with a drop of polishing paste.
 The advantages of this method of cast iron restoration:
- Enameling will cost inexpensively.
- Minimum dismantling work.
Disadvantages of enameling:
- After a short period of time, the enamel turns yellow again.
- Paint keeps on a surface no more than five years.
- You can only use the restored bathroom after a week.
- Enamel is not able to hide irregularities present in the factory coating.
DIY enamel repair with liquid acrylic
Repairing an old bathtub with acrylic or a “bulk bath” has nothing to do with the previous enameling option. Moreover, the surface should be carefully prepared.
Important! After carrying out all the preparatory work, the applied composition on the old enamel completely hardens, thereby forming a kind of liner.
Acrylic application technology looks like this:
- To prevent cracks and chips from appearing on the already repaired surface, they are putty right in front of the primer.
Important! It is better to use fiberglass based car putty. It is applied to damaged areas with a rubber spatula.
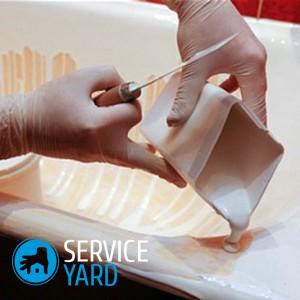
- Now a bucket of acrylic opens. The composition is properly mixed with a drill, and for this you need to wear a special nozzle on it.
- The drain is closed with a disposable cup, and the bucket is placed in the bath at the bottom.
- The finished mixture is poured into a small bowl.
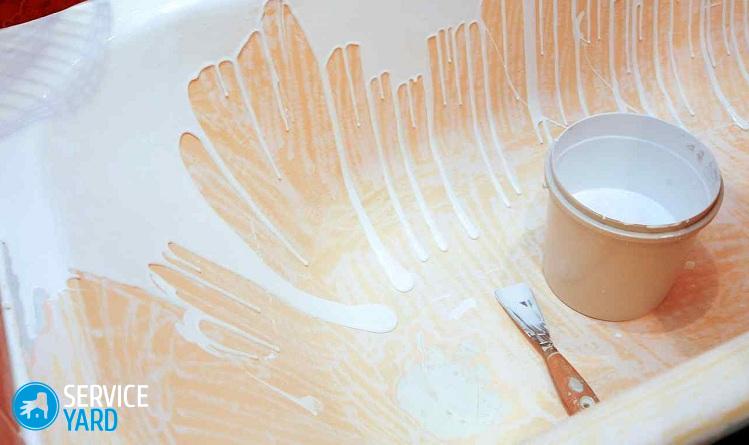
- Recovery should begin with the sides, while the entire acrylic is poured on the surface of the bowl. Using a spatula, it is distributed in the corners and along the edge.
- After the mixture drains to the bottom, you will have empty areas. Acrylic rises with a spatula to them, with gentle movements from the bottom up.
- After the surface is completely filled, it is necessary to open the drain so that the remnants of acrylic flow out into the substituted container.
- For complete drying of this material requires at least a day.
Advantages of the “bulk bath":
- Quick drying.
- Does not turn yellow over time.
- Durable coating.
- Even wet acrylic does not slip.
- The period of operation is at least 10 years.
Disadvantages of using acrylic:
- Acrylic bathtub restoration technology itself is rather complicated. Therefore, the person involved in this work must have certain skills and experience.
Bath restoration with an acrylic liner
The restoration of old bathtubs with an acrylic liner, in fact, is nothing complicated. In the process of performing work, a new plastic bowl is glued inside the bathtub, which is completely identical and repeats the shape of the old one. Such inserts are produced in factories in accordance with current standards.
Important! The back side of such bowls, as a rule, is additionally reinforced with fiberglass. A high-quality acrylic insert must have a thickness of at least 6 mm.
Process features
Preparing and restoring a bath according to this technology is as easy as shelling pears. In this case, you do not need to grind and clean the bath.
Installation Technology:
- It is necessary to putty cracks and chips.
- Then remove the overflow and drain.
- Now you need to remove the sides adjacent to the bath.
- Carefully dismantle or cut the ceramic tile elements with a diamond blade.
- The purchased insert must be marked, trimmed and drilled in it for drain holes.
- We apply sealant around the overflow and drain, and on the rest of the surface where the liner will be attached, special glue.
- Now carefully insert the acrylic insert into the bathtub, remove excess silicone on all holes, install decorative grilles.
- We fill the bathtub to the brim with cold water, leave for a day.
Advantages of using an acrylic liner:
- The surface is perfectly flat.
- Such coverage will last at least 15 years.
- The aesthetic qualities of the liner remain for many years.
Disadvantages of bath restoration with acrylic liner:
- The surface is hypersensitive to mechanical damage.
- Inserts often do not fit the size of the bath.
- Additional demolition work required.
- The high price of restoration, but if you do it yourself, it will be cheaper.
Stock footage
As we can see, all the presented methods of cast iron bath restoration are good in their own way, each has its positive and negative sides. But in order to achieve the desired result, the main thing is to adhere to a clear technology for performing work.
- How to choose a vacuum cleaner taking into account the characteristics of the house and coatings?
- What to look for when choosing a water delivery
- How to quickly create comfort at home - tips for housewives
- How to choose the perfect TV - useful tips
- What to look for when choosing blinds
- What should be running shoes?
- What useful things can you buy in a hardware store
- Iphone 11 pro max review
- Than iPhone is better than Android smartphones
 (No ratings yet)