What can I sew with a child?

You have accumulated a number of shreds that are difficult to find application, but sorry to throw out? Nothing wrong. What is not suitable for sewing clothes, it will fit for children's crafts. What can I sew with a child? In the article you will find several ideas that may interest you. You can make interesting gizmos for a doll’s corner or home decorations, and at the same time teach your child simple cutting techniques and the most common seams.
to contents ↑What do you need for sewing?
First, let's examine your casket. You may not need to buy anything. A preschooler or primary school student is hardly able to handle a sewing machine, so everything will have to be done manually. Or to divide the work - you sew what you need on a typewriter, and the child sweeps, sews buttons and does other small, but necessary work.
For needlework with a child you may need:
- shreds of all varieties and species that can only be found;
- needles for hand sewing, best with a wide eye;
- bobbin threads - black and white should be required, but colored ones will also be needed;
- braid;
- scissors - tailor's and curly;
- fittings;
- cardboard;
- ruler;
- pencil.
to contents ↑Important! It is important for the child to quickly get the result, otherwise - he begins to lose interest in classes. Therefore, looking for ideas that you can sew with a child, first choose something very simple.
Where to begin?
Having decided to teach a child to sew, a caring mother will inevitably encounter the thought of the first product. Much depends on what kind of scraps you have. If thin - cotton, linen or synthetic, there are no questions. Of course, your student’s first product will be doll bedding. It seems to you that there’s nothing to sew there at all, and the child does not think so.
Sheet
The simplest products are sheets or tablecloths. However, keep in mind that the child still does not know how to sew, or maybe he hasn’t tried to cut. Therefore, everything must be done seriously and responsibly, that is, to observe all the same operations as in the manufacture of real clothes:
- Measure the doll bed. Remember to explain to your student that the sheet should be several centimeters wider than the bed.
- Think about how you will bend the edges - walk or overcast along the contour. In the first case, allowances must be left, in the second - no.
- Draw a rectangle of the appropriate size on paper or cardboard - at the same time show the child how to control the right angles. You can use a regular wooden square.
- Circle the pattern on the fabric - this should almost always be done on the wrong side.
- Cut the workpiece.
Further, it all depends on the method of processing the edge.
Option 1
The easiest way (unless, of course, the child has already mastered the buttonhole stitch) is to overcast along the contour. You can do this with a contrasting thread, or you can even tie it.
Important! Bed linen is an easy and feasible task. But you can create more original gizmos. For example, we offer you the following master classes to help:
Option 2
It will have to be hemmed evenly, and for an inexperienced seamstress to do this is not so simple. Therefore, you can do the following:
- Spread the blank of your sheet.
- Place a cardboard template on it so that the allowances are the same on all sides.
- Iron cardboard allowances - this is what pockets on children's and adult clothes do.
- Bend the stocks and iron them again.
- Hem your creation - you can use a hidden seam, “goat” and even “back needle” if you have threads that are exactly in tone or contrasting. Note that the line should be on the front side.
Important! If necessary, allowances in the corners can be cut obliquely, explaining to the child why you are doing this - the hem should be even and without coarse fragments.

Duvet cover
The next thing that can be sewn with a child at the very beginning of his practical sewing journey is a duvet cover. First, of course, you need a blanket. But with this, everything is just simple - if there is a suitable piece of drape, cloth or other fabric that does not crumble very much, there are no problems at all:
- We make a rectangle template or even just draw it on the fabric.
- Cut out. And to make it more beautiful, we use curly scissors.
Important! It hardly makes sense to sew a classic duvet cover with a rhombus in the middle with a child - such a small job is unlikely to work out neatly. Therefore, you can sew this little thing from two identical panels with a fastener on small buttons or buttons. The doll does not kick in a dream, so the blanket will not stray. And it is not necessary to apply a linen seam - it is still complicated for your student.
- We draw 2 identical rectangles on fabric or according to a pattern.
- From all sides we leave allowances of 0.5-1 cm, and where the fastener will be, a little more so that you can bend the cut twice.
- Fold the rectangles with the wrong sides outward, combining all the slices.
- We sew them on three sides - it is possible on a regular typewriter, it is possible on a nursery, or it can be done manually, with a “back to the needle” stitch.
- We turn out.
- We bend open sections twice inward, we sew a “needle back” seam.
- Sew 1-2 small buttons.
- We cut out and overcast loops, or make air loops.
- Insert the blanket.
Important! A pillowcase is sewn in the same way as a duvet cover, and as a pillow you can use a piece of thick drape or cloth folded in half.
Toys
It would seem, why make toys yourself if in any children's store shelves are simply bursting with bears, dolls, dogs and everything else? Meanwhile, even a very spoiled child will not remain indifferent to a home-made doll, and if he managed to make it himself, even if with your help, there will be no limit to happiness.
To make an interesting toy, it is not at all necessary to sew absolutely everything. You can use the finished parts. Perhaps it’s better to start with theatrical puppets - you will have to sew only the heads and hands, and you probably already have everything else. The rest are things that are out of use for various reasons:
- lonely mittens, gloves and socks;
- sleeves:
- trouser legs.
The head, hands and various convex parts must be stuffed with something. Sintepon pieces are best suited, but for such small items, foam rubber, cotton wool, and finely chopped nylon tights will do. Pieces of fur, threads for embroidery, the remains of yarn and other “production waste” can be very useful.
Glove doll
You can take any glove - both for children and adults. The head will be on the middle finger, so it can be left as is, especially if the glove is small. Large - you can cut off and overcast the tip. As for the other fingers, we do with them like this:
- We leave the index finger as it is.
- Large - cut off at the base and carefully seal the hole.
- For the nameless and the little fingers, we cut off the ends and cut them lengthwise so that it can be joined into one “sleeve”.
- Sew the cut edges (make sure that the glove does not open).
Head
The head can be made in several ways:
- to stitch;
- glue using papier-mâché technique;
- make of a tennis ball.
Ping pong ball
The easiest option is to use a plastic tennis ball. A hole is made in it, into which a cardboard tube is inserted.
Important! You can twist a tube from a strip of cardboard, and if you suddenly find a thermometer in a pharmacy in a cardboard case in a pharmacy, you can’t imagine anything better.
The face and hair are stuck.For eyes, mouth and cheeks, you can use, for example, colored tape or paper with an adhesive layer.
Papier mache
When making a head from papier-mâché, you don’t have to sew either. A ball is taken, glued in several layers with torn paper (for example, pieces of newspaper, and starch paste is most suitable as glue), primed with white gouache or a water-based emulsion and painted. On top of all this can be varnished.
We sew a head
Plastic and papier-mâché have only one drawback - it’s quite difficult to make the heads so that they hold, and for a younger student, this is not at all possible. Therefore, it is best to sew a head. Attaching it to the glove will be much easier. You need:
- a piece of white, pink or beige fabric - it’s best to take something like polyester, but in general everything that is is suitable;
- synthetic winterizer or foam rubber;
- colored threads for the face;
- buttons (sometimes it’s better to make eyes out of them);
- yarn for hair.

The advantage of this manufacturing method is that the ball can be sewn without any pattern, and it can be shaped by packing:
- Cut out the circle.
- We sew it along the edge with a seam “forward needle” with medium-length stitches.
- Tighten slightly.
- We stuff with syntepon.
- We give the necessary form.
- We insert, if necessary, a tube or a wand so that you can control your head.
- Tightly close the slice - you can smear it with glue in the place where it adjoins the stick or tube.
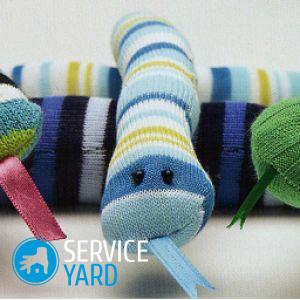
Important! If it seems to you that this option will be too difficult for the first experience, then try our simpler ideas first, how to make a sock doll.
We make a face
In what order to do hair and face is all the same, but generally it is better to make hair first:
- Outline the contours of the face (a useful thing is the aquamarker).
- Cut the yarn - the length of each thread should be twice as long as the proposed strand of hair.
- Mark the crown and a few circles along which you will sew the threads.
- Fold all the threads in half.
- Sew them first in the outer circle.
- Make another circle so that the new strands cover the place of attachment of existing ones.
- So do a few more laps.
- Sew locks on the crown with the same yarn from which all hair is made.
- Trim your hair.
Face
After what you and your child have already done, there are mere trifles. However, the result of all the work largely depends on these trifles, so you should try:
- Designate space for the eyes, nose, cheeks, and mouth.
- Buttons can be sewn as eyes or 2 circles can be embroidered - just make sure that they are the same size.
- At the place of the nose, embroider a circle or make a small ball of fabric, stuff it with a padding polyester and sew it.
- It is best to embroider a mouth - a circle, a heart or a crescent.
- You can also make pink cheeks by sewing hearts, circles or ovals.

Collect the doll
The most responsible is already behind, it remains only to assemble and finalize the doll:
- Sew on the head - it should look towards the palm of the glove.
- Make hands - just like the head, only smaller and without any tubes or sticks.
- Make a collar around your neck - for example, from a piece of lace.
- Make and sew cuffs.
We sew a bedspread
A very interesting occupation is sewing from shreds. Of course, in itself it is a rather complex form of art, and real masters make very complex compositions. But something can be done with the child, even if he is still just mastering the basic seams. However, a significant part of the work will still have to be done by you. But the contribution of your assistant will be very important. He can:
- help pick up shreds by color and size;
- make a template;
- cut out the details;
- sweep away individual fragments.
Getting started
Making even the simplest coverlet begins with the selection of shreds and drawing a template. With shreds, everything is simple - as they are, they are good. The main thing is to arrange them so that they more or less look good together. As for the template, it can be:
- square;
- rectangular;
- rhomboid;
- triangular;
- hexagonal.

Important! Of course, others are also applied, but if you are just starting to do this business, and even with your child, it is better to choose a simpler form.Even a preschooler can fully cope with the deletion of a square or rectangle, if you explain to him how this is done and help draw the first right angle. A child can also carve out a foundation if the product is small - after all, it is also a rectangle, only of dense fabric that does not stretch too much. Do not forget to explain to the assistant that you must leave allowances on all sides. And if you want a warmed blanket, you can also make a gasket from sheet sintepon.
Operating procedure:
- Invite the child to carve out a lot of the same squares according to the pattern, leaving allowances on all sides.
- Ask the assistant to calculate how many squares need to be sewn together to make a strip equal in width to the future bedspread.
- Invite him to start the process, that is, sweep together two identical squares, explain that you need to sew on the wrong side.
- Stitch these two squares and invite the child to sew the third, then the fourth and the rest.
- In the same way, make the remaining strips.
- A child can also sweep strips together, and you just have to make up.
Important! Trying to have an interesting time with your child, leave a few more interesting ideas for yourself:
The final stage
So, you have the basis, all the strips are ready and even sewn together. It remains only to collect the bedspread. This is done in the same way as if you sewed it from two identical pieces of fabric:
- Fold the parts with their faces facing each other.
- Stitch together, leaving a small open area so that the product can be turned out.
- Turn out the bedspread.
- Close the seam.
- Iron the seams well.
Important! Thus, it is possible to sew a blanket with the child at home for both the doll bed and the nursery. And if there are suitable shreds, nothing prevents you from making an interesting rug in this technique.
Mat
Do you have a second child younger? Why then not make him a didactic rug with his elder? It can be very simple. You need:
- drape or cloth for warp;
- pieces of different dense fabrics for didactic elements;
- buttons - which are;
- band for loops;
- scissors, needle and thread.

And then - everything is simple, and nothing will prevent your older child from doing an exciting and very useful thing:
- You need to cut a large rectangle for the base.
- Cut figures - flowers, geometric shapes, animals, houses;
- In each element, cut and sew a loop.
- Sew on the base of the button in random order.
to contents ↑Important! Figures can be hung up at random. Such a toy will give the youngest child the opportunity to develop fine motor skills, the oldest - to make an interesting and necessary little thing.
Stock footage
In a word, there are a lot of opportunities to teach a child to sew. The most important thing is that he feels joy and sees the benefits of his work, that is, all the items that you sew together with the child must also have practical value.
 (No ratings yet)