Sealant for the washing machine
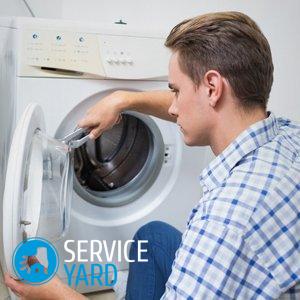
Having an automatic washing machine at home, you need to know how to properly maintain it and how to independently replace the bearings, repair the tank. Many consumers ask the question: is there sealant for the washing machine or not, can it be used and in what cases? Today we will tell you how to repair the tank of the washing machine with your own hands and how to glue the tank after the repair.
to contents ↑Washing machine tank repair
A tank is the main part of such equipment in which moving elements and a drum are located. Water is accumulated in it and washing takes place in it, although the linen contacts the walls of the drum during the process. If the cause of the breakdown becomes a tank or a movable element located there, then you have to disassemble the washing machine to the base:
- disassemble the case;
- get to the tank;
- then take it apart.
- after repair, do everything in reverse order.
So if you decide to repair the tank of the washing machine yourself, then do everything the first time and honestly, otherwise you will have to re-disassemble the unit. And it is very time consuming and laborious.
Important! The sealant can also be used to repair other parts of such equipment. Read also about washing machine door repair.
What breaks in the tank?
This part of the automatic washing machine may break:
- Bearing. This is one of the most important elements on which the whole work of the mechanism depends. The bearing itself is worth a penny, but to replace it will require disassembling the machine, while there is a risk of damage to the shaft, pin and other parts.
- Shaft. This element may become deformed during the repair and replacement of bearings.
- Drainer. The hole itself cannot be damaged, but the drain valve that is installed on it can become unusable. The only malfunction that can occur with the hole is a blockage that needs to be cleaned periodically.
- The walls. Under the influence of centrifugal force, as a result of contact with the drum or in case of damage to bearings and shock absorbers, the tank walls can get damaged, which will violate their tightness.
to contents ↑Important! If the failed bearing is not replaced in time, this can lead to complete destruction of the tank by the vibrating drum. After such a breakdown, it will have to be completely changed.
Before attempting any disassembly of the equipment, carefully check the error codes and note the signs of damage. Read more on our article to help you quickly figure out malfunctioning washing machines and restore their working condition without unnecessary movements.
Features of disassembling tanks and their assembly
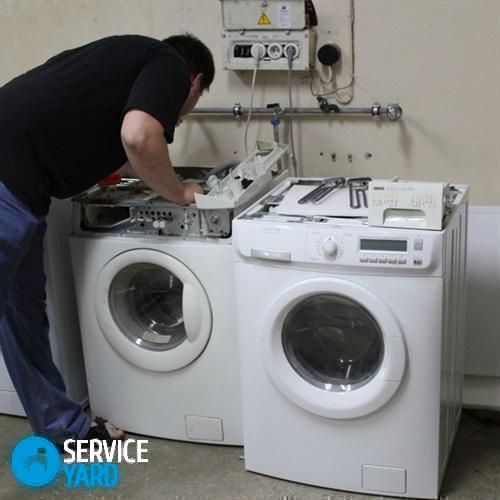
Repair of the washing machine tank is carried out according to a specific algorithm. The procedure for disassembling such a part in all models of machines is similar, regardless of whether it is a non-collapsible version or a collapsible one. We describe the entire disassembly process using an example of a non-collapsible tank, since it is much more complicated.
Instruments
In order to disassemble the tank (drum), prepare the following tools:
- A set of screwdrivers - among the screwdrivers must be cross-shaped and slotted.
- A set of hexagons.
- Screwdriver.
- Hammer, pliers.
Important! If you suspect a breakdown, immediately prepare the necessary parts for replacement, since disassembly is a very time-consuming process.
Most washing machines have a horizontal type of loading, but some models have a vertical loading. Consider how to prepare the device for dismantling the drum.
Front-loading washing machines
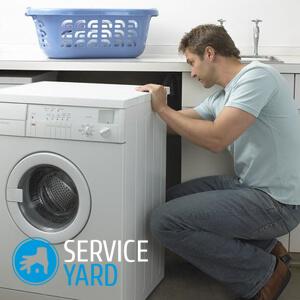
First of all, to repair the tank of the washing machine with your own hands, unplug the device and pull out the drain hose. Shut off the water supply hose.
Then proceed directly to the disassembly process:
- Remove the back panel of the device by unscrewing the screws with a screwdriver.
- Remove the front panel in the same way.
- Remove the powder loading container.
- Remove the control panel using a slotted screwdriver. Do not completely remove the control panel, but place it on the side, since the main thing is that it does not interfere with the disassembly process.
- Remove the sunroof cuff and bottom panel.
- Remove the screws on the bottom panel.
- Disconnect all elements from the tank: shock absorbers, electronics and other parts. (Wiring is usually attached to the tie rods or hooks).
- Disconnect the wires from the heater and from the motor.
- Remove the motor by unscrewing two bolts. Separate it from the tank.
- Dismantle the tank by the springs, lifting it up out of the housing, very carefully so as not to damage the wiring.
- After removing the tank, unscrew from it everything that may interfere with further disassembly: the front balancing weight, the pulley, the heater.
Top-loading washing machines
Models with a vertical type of loading are more ergonomic and take up little space. The loading tank in such machines is fixed with screws.
To make it more convenient to repair the tank of the washing machine with your own hands with this model, remove the drum in this way:
- Disassemble the back and front walls of the device by removing the screws with a screwdriver.
- Slide the side panel to the side.
- Remove the side panel completely.
- Remove the wiring around the circumference of the casing.
- Loosen the screws.
- Remove the screw securing the shaft.
- Pull out the drum.
Which washing machines have collapsible tanks?
Italian-made devices and other high-quality and expensive foreign-made models have collapsible tanks, for example, "Electrolux" or "Indesit" of the Italian manufacturer. To disassemble the drum of such units, it is necessary to find the place of attachment of its two halves, and then remove the screws that hold them together.
to contents ↑Important! When disassembling the drum, carefully inspect the condition of all parts. If necessary, wipe them from dust and dirt.
How to disassemble the drum of an Indesit washing machine?
Many companies that produce washing machines make tanks not collapsible for the following reasons:
- firstly, they are easier to manufacture, since there are no screws or mounts;
- secondly - it is beneficial to the manufacturer, in case there is any breakdown inside the tank, then it will have to be changed entirely.
Consider disassembling the drum of an Indesit washing machine, since for all models with a non-separable drum, this process is similar.
Proceed as follows:
- Take out the tank with the drum inside the machine (dismantling process was described above).
- Carefully inspect the removed part from all sides to determine the location of the soldered seam, to identify places for drilling holes for future fasteners.
- Using an electric drill, drill 15-20 holes in a circle at a distance of 4-5 cm (drill diameter 3-4 mm).
- Saw the welded seam of the body into two halves with a hacksaw for metal or a blade with enlarged teeth.
Important! When cutting the body, do not go too deep (maximum 5 cm), as you risk damaging the walls of the drum.
- After cutting the case, there should be two halves: the front - in the form of a ring of irregular shape, in the middle of which a hatch and a rubber cuff, and the back - contains a drum.
- Turn over the main part of the tank and find the place of attachment to the drum.
- Remove the drum with a screwdriver.
- After dismantling the drum, carry out the necessary repairs.
Important! If, after analyzing the equipment, you noted that the cuff on the drum is covered with black spots, it is very convenient now to do it. To do this, follow our instructions for replacing the gum in the washing machine.
Troubleshooting
After dismantling the drum, carefully inspect its axis for damage to the seats, as well as the fracture of the rays of the cross:
- if the rays are damaged, then the replacement of the cross is inevitable, it will not work out with “weld” with something like argon;
- in case of significant damage, replace the brass gland bush.
Important! Change bearings with a set - front and rear. Before installation, be sure to try on new bearings to the drum shaft. They should sit with a stretch, without backlash. To press in new bearings, use special nozzles or the outer ring of the old bearing - this will avoid damage to new parts. Together with the bearings, press in the gland with Litol grease. For the bearing to work reliably, press the grease very tightly into the stuffing box.
Useful Tips:
- If you dismantled the tank, then check the integrity of its walls. In case of damage and cracks, it is better to purchase a new tank body, for example plastic, as it is cheaper than metal.
- If the tank is stainless steel, then it can be brewed, but entrust this process to an experienced welder who will perform all the work carefully. After welding, paint over the seam with waterproof enamel. Remember that no sealant for the washing machine or cold welding when the tank is damaged will help.
- When repairing the tank of the washing machine with your own hands, be sure to check the drain valve and drain hole for blockages and malfunctions. If you can’t remove the pile with your hands and water stone fails, then use sandpaper.
- Remove the seals from the loading tank with a regular flat screwdriver (pry them off). Knock out the bearings with a hammer and a metal rod, equal in diameter to the section. Point the metal rod to one edge of the bearing and apply a light blow with a hammer, then - transfer the rod to the other edge of the bearing and strike again with a hammer. You cannot hit on one edge of the bearing, as it will be broken.
How to seal the tank of the washing machine?
After repair and replacement of faulty parts, it is necessary to assemble the tank in the reverse order:
- First of all, carefully process the joint surface of the halves of the tank. They should be smooth and without gross scratches that may remain from sawing. To clean the surface, use a clerical knife:
- set the blade at 90 degrees to the work surface;
- grind all irregularities, resulting in perfect smoothness.
- Degrease the joint surface of the two halves of the tank.
- Lubricate the stuffing box and shaft with stuffing box grease.
- Insert the drum axis into the bearings.
- Secure with a pulley.
- Apply silicone glue (aquarium silicone sealant for the washing machine is perfect) on both halves of the tank.
- Lubricate the sealant to make it even.
- Place both halves of the tank on top of each other.
- Pull the halves around with bolts until the silicone is dry.
- Let the glue dry.
- Assemble the washing machine in the reverse order: tighten the front load, install the heater, hang up the tank, connect the nozzles, engine, etc.
to contents ↑Important! To qualitatively glue two halves of the tank, you can use car sealant for the washing machine. Lubricate the front wall of the tank, as the edges on it are more clearly visible.
Stock footage
Repairing the tank of a washing machine is a rather complicated and lengthy task, because you need to not only disassemble the device correctly, remove the tank, disassemble it without errors (after all, not all washing machines have collapsible tanks) and only then proceed with the repair. Yes, and not the fact that this repair can be done at home - it all depends on the malfunction. We hope that the information presented in the article will help you to realize your plan a little, and the washing machine will be grateful to you and repay with high-quality and long-term work.
 (No ratings yet)