DIY bead earrings
Nowadays, beadwork is gaining more and more popularity. A lot of various accessories are weaved from it and not only - full-fledged panels and icons are embroidered from beads, weave baubles, make beautiful crafts. Thanks to the simplicity and accessibility of such a wonderful material, thousands of skilled needlewomen love it so much that they independently produce real jewelry according to their own special designs and ideas. You can make magnificent bracelets, necklaces, rings, and even earrings from beads with your own hands from it. Some works are considered copyright, as they are executed according to one, non-repeating weaving pattern. In our article, we will consider several detailed lessons on how to make earrings from beads.
to contents ↑Important! Such wonderful material as beads should not lie on the shelf of the craftswoman, therefore, we recommend that you look at our other articles about the options for its use:
How to make earrings from beads with your own hands. Schemes for beginners.
Weaving such earrings is not at all difficult, but easier than simple. Today we will tell you how to make ring-shaped bead earrings.
To work, you need to prepare the following materials:
- Beads of the same color.
- Earrings rings.
- Fine wire to match the beads.
- Round pliers.
- Scissors.
Getting started:
- We fix the wire on the earrings, near the fastener. To do this, we wind one end of it at the very base of the fastener. We fix the spiral with pliers, leaving the rest of the wire completely free.
- We string small parts onto the wire and wrap it around the entire base of the ring, constantly making circular movements. We try to do the work so that between the rows there are no gaps - as close as possible.
- After winding the wire with small elements - we fix it with the same loop as at the beginning of our work.
Important! If suddenly the ends of sharp material remain, then do not forget to cut them with scissors so as not to get injured when using this jewelry.
- We perform the second earring in the same way.
That's all! We received original ring shaped earrings. Outwardly, one might think that all work consists only of small elements, and only a fastener from another material.
to contents ↑Important! After the first pair of bead earrings is ready, the thirst for possession of original jewelry will not disappear, and the desire to sparkle with unusual jewelry will only increase. As a novice jewelry maker, you just need to take note of our master classes:
DIY handmade bead and bead earrings
This option is very funny - multivariate earrings that are woven in a variety of ways, using the original pattern, complementing it with your ideas, alternating beads and beads of different colors and sizes. In a word, there are a lot of options.
Let's look at the simplest one:
- We pick up on the wire one simple row of a chain, consisting of 12 blue beads.
- We shove the wire into the very last bead, forming a small ring, where we hang the next bead of the same color. By such actions weave the second round row, stopping at the very last bead.
- We fix the last element with the first of the first row using a small node. To do this, thread the wire through two beads at once.
- We continue weaving the next circle in white, performing only one row, not two.
- Weave the next circle in blue.
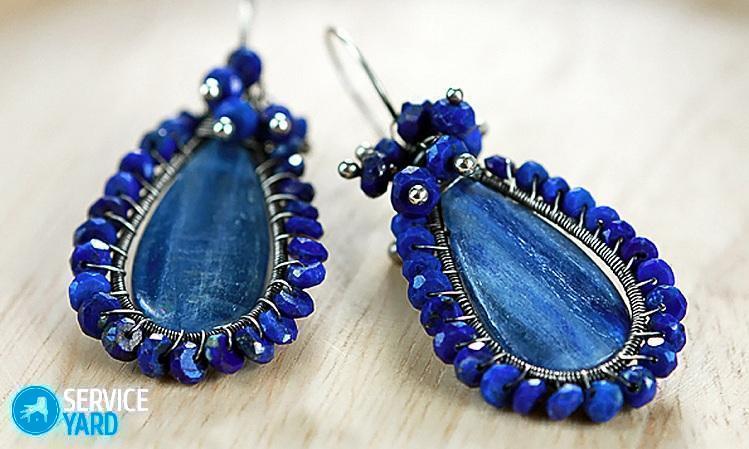
- We carry out the latest central module with white beads, ending the row with one beautiful large bead - this can be a semiprecious or any other stone.
Our earrings are ready to please your mistress!
to contents ↑Important! Before starting work, it is extremely important to choose the right thickness of the wire for the diameter of the material itself. So, for example, if the wire is very thin, then the beads simply will not hold, and the conceived pattern will not work.
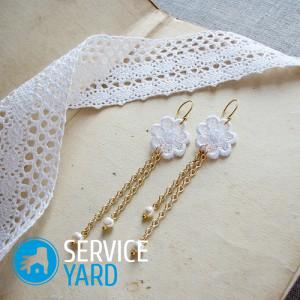
DIY long bead earrings
The very first earrings made of such accessible material were made using a very simple parallel weaving technique, which even the most inexperienced craftsman can study. In this way, a smooth bead cloth is obtained, which can be modified at your discretion. So, let's figure out how to make earrings from beads of such a model.
What we need to prepare:
- Beads of different colors.
- Thick fishing line.
- Details of the clasp.
Step-by-step algorithm of actions:
- Cut the fishing line to a size of 90 cm.
- We collect only one detail on it.
- Gradually increase the number of beads, stringing already two beads on one of the ends of the fishing line.
- We make a cross-shaped intersection of the fishing line in these last elements.
- We increase the number of parts with each subsequent intersection.
- Upon reaching 11 braided beads in the first row, we continue to weave parallel lines with the same amount of material. The number of rows depends on the desired length of the finished product.
- Having achieved the desired length, we begin to gradually reduce the number of elements in each row of the canvas, forming the sharp tip of the earrings.
- We fasten the clasp on the bead tip with a free fishing line.
- Performing such manipulations, we make a second earring.
to contents ↑Important! You can modify the pattern and color on the canvas, performing it according to your individual pattern. Earrings can be supplemented with hanging pendants that need to be strung on a fishing line in a row and tied to the main canvas.
How to make DIY snowflake earrings from beads
This master class involves the manufacture of very spectacular earrings in the form of a neat snowflake. There are some peculiarities in the process of work, since you need to buy special double beads to get such an original jewelry.
So, we will prepare the necessary materials and tools:
- Superduo Beads.
- Bead marking 11/0.
- One faceted bead.
- Fishing line.
- Needle for stringing beads.
- Metal ring.
- Schwenzy.
A detailed workshop on manufacturing:
- We collect six superduo beads and six ordinary beads on a suitable fishing line. We have the last set at the very end after the first.
- We tie both ends of the fishing line together, forming a circle, which will serve as the basis of our snowflake.
- We draw one end of the fishing line through all the details again to finally fix them.
- We draw a needle into one double element, string two double beads and pass the hole of the next part. We perform such manipulations with the first circle of our snowflake.
- In order for our weaving to be strong, we fasten each row with a continuous fishing line through all the elements of weaving.
- Insert the needle into the holes of the pair of “superduo” beads, which are still free from above. In the middle of the wire knot we insert one bead and stretch the thread into the bead of the lower row.
- We attach three ordinary beads to the next pair of double element and again insert the needle into the neighboring hole of the double bead.By such actions we finish the whole series of our snowflakes to the end.
- We perform the last row, removing the line from the first element. Next, we collect three small beads and enter the third bead of the previous weaving with a needle. Finishing the last row of our future snowflake, we attach the ring for the clasp in the right place.
- Under the clasp on one vertical line we string a large faceted bead in the following sequence: two small beads, a faceted bead, three small beads.
- Again we draw the line through the large bead and small bead in front of it.
- We string the latest detail and fix the fishing line with a knot.
- Take a small piece of fishing line, thread one end into the bottom loop of the clasp and tie it with two knots, burning the end of the fishing line with fire.
- According to the above scheme, we make the second long earring.
to contents ↑Important! This option is suitable for those who have good beadwork techniques. If you are new to this business, we recommend that you take on easier schemes.
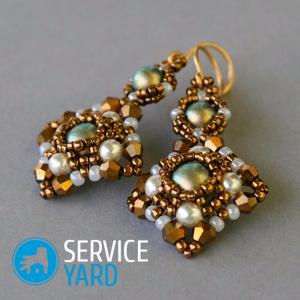
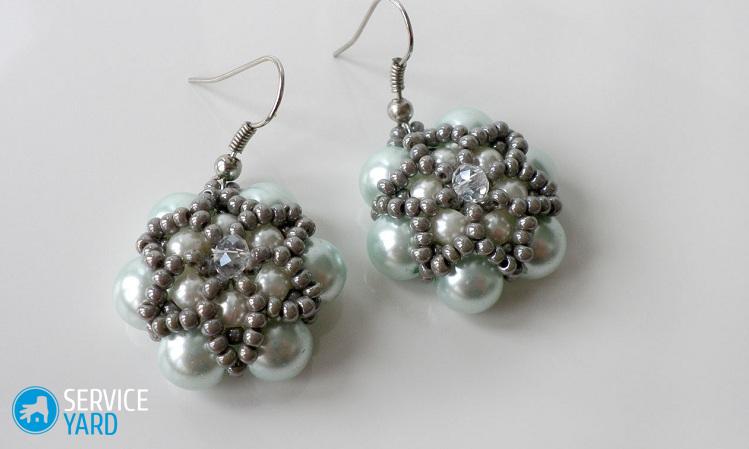
DIY bead and bead earrings - mosaic weaving patterns
Earrings are no less beautiful, made in the technique of mosaic weaving. Compared to the previous version, weaving such an ornament is possible for each girl.
We will prepare everything you need:
- Marking beads 11/0 golden.
- Faceted round beads 5 mm purple.
- Faceted pink drop-shaped beads.
- Needle for beads.
- Fishing line.
- Schwenzy.
Step-by-step weaving scheme:
- We collect 36 golden beads on the fishing line and bring them into one circle.
- Draw the thread again through all the beads to add strength to our weaving.
- We draw the next circle with weaving, adding the necessary number of beads to the very end of the second row.
- Starting from the middle of the circle, we begin to form small elevations of small elements. We collect three beads on a fishing line and stick the end of the fishing line into the next bead from the previous row. We make these slides that will be located on one half of our circle.
- We continue to work with mosaic weaving in the following sequence: four golden beads, two golden details on a fishing line, three times mosaic weaving, four golden beads.
- We perform the slides again using a special scheme. At this stage, we got the following picture: the number of hills is six, each bead slide is woven of five beads.
- We string five gold details on a fishing line using mosaic weaving.
- We draw the line through two golden beads, stringing one piece on a loop. Repeat the previous action again.
- We pass the line through two beads, ending in a row of five exactly the same beads (golden color).
- We weave five slides with six golden elements and one lilac.
- We string seven golden beads on a fishing line and drive the needle into the first golden element.
- Using mosaic weaving, we string four beads and the next two more.
- After weaving the upper part of the earring, we make a loop of five small parts, which will fix the clasp on the fishing line. Through three elevated beads we introduce a needle, string two elements, then a drop-shaped bead. We collect one ordinary element on the fishing line and one large round bead for our pendant. We connect the pendant with the bead part of the earring in all the lower corners.
- We cut off a small piece of fishing line, introduce it into the very top of our earring, string five golden beads, form a ring. We take a fastener, we pass a loop through a ring, we finally clamp a metal в зу.
Golden earrings are ready!
to contents ↑Important! However, it is not enough just to weave, dazzle or knit unusual jewelry; they still need to be correctly and skillfully selected for your wardrobe. A sense of style and a selection from our archive will help you with this:
Stock footage
We shared with you detailed lessons on making beaded earrings. As you have already seen, you can create such an accessory with your own hands, spending at the same time only on inexpensive consumables. Try to make bead earrings yourself, and you will not regret it!
 (No ratings yet)