Paper flowers on the wall
Not many craftswomen know that you can independently decorate paper decor with airy, light, dense, neat, multi-colored, bright, delicate and weightless flowers. You can use the elementary scheme and create simply chic jewelry for your home. Everyone can make flowers from paper on the wall, which will definitely take their rightful place in the house. The main thing is to know how to fix them and where to place them. They can be decorated with a living room, bedroom or children's room. In this article we will give a large number of workshops on the manufacture of both simple and complex products.
to contents ↑How to make simple paper wall flowers with your own hands?
In this section, we will consider some of the simplest and most interesting examples of how to make paper flowers on the wall using the minimum amount of improvised materials and tools.
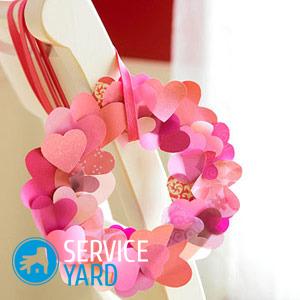
Flowers-hearts with photo
You can easily make beautiful flowers with your own hands, and you will need such materials and tools for this:
- Cardboard.
- Paper.
- Pencil.
- Scissors.
- Glue.
- Buttons
Perform the work according to this scheme:
- Fold the paper in half, draw half the heart.
- Carefully cut the workpiece to use it later as a template for making other petals.
- Cut 8 petals for one flower. Consider this calculation when planning how many flowers you want to make.
- From the cardboard, cut out the base for the flower in the shape of a circle.
- Gently attach one petal after another to the circle. There is no need to use glue yet.
- Arrange the hearts in such a way that each next element completely covers the previous heart with its half.
Important! Make sure that the petals are even on the circle, there are no shifts.
- Put glue in the center, attach a button to it to hold the petals together.
Important! If you want to complicate the work a little, you can use several colors of paper. The edges of dark color with a light middle of the petal just look wonderful. To make such a flower, you need two patterns of hearts and paper in two colors.
Three-dimensional flowers-hearts
If you want to get a more dynamic and voluminous craft, then use another method of attaching the petals.
Use the following scheme:
- Prepare all parts according to the already known scheme.
- Then bend your hearts in half - you will end up with double halves, a bit like books.
- Each half of the heart, glue with adhesive on one side and attach to the base.
Important! Make sure that the petals open in one direction.
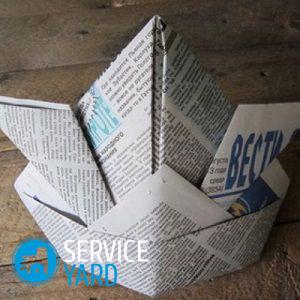
Accordion flowers
The simplest method that is used to create volumetric flowers on the wall is to fold designer paper with an accordion and give it the necessary shape.
Make them following this instruction:
- Prepare a 2.5 x 28 cm paper strip.
- Decorate one of its edges, cut with curly scissors or use a hole punch.
- Fold a stripe accordion. Work through each fold carefully.
- Apply glue to the extreme side of the fold, then put the papers together in a ring. Leave it to dry.
- In the meantime, cut a circle-center out of the same paper.
- Apply glue directly to the core, then smooth the accordion evenly over it.
You can use another principle of making large flowers:
- Take three identical-sized sheets of paper, stapler, glue.
- Fold each leaf with an accordion.
- Take one of them, bend in half, fasten the bend point with a stapler.
- With each sheet you need to make such manipulations.
- Then, with a stapler, three finished fans are held together.
to contents ↑Important! If you make a little effort, you can even make two-tiered products of different widths and different colors.
How to make specific flowers out of paper on your own?
Perhaps you like some specific flowers and want to decorate your house with them, then you will definitely like this section. We will give in it detailed schemes for the manufacture of the most common plants that have long been able to win female hearts.
Charming asters
To create such a product, you need a little accuracy and patience to cut exactly the same strips to make a fringe.
The following materials are needed:
- Colored paper.
- Toothpick.
- Scissors.
- Glue.
It will take the following steps to get such a wonderful decoration on the wall of paper:
- Prepare two strips of different widths. Narrow - needed for the base, and wide - to create petals. You will need one different strip for each product.
- Cut the fringe to a wide strip.
- Put a thick strip on the table, attach a thin strip to it on top of the edge and to the right so that it goes slightly onto the thick strip.
- The strips should be fastened, like train trains. Glue them, wait for them to dry.
- Using a toothpick, twist the flower from the side of the thin base, grease with glue.
- Smooth all the petals, make leaves out of green paper.
Tender tulips
An elegant and strict tulip will become an unobtrusive wall decoration, because this is the first messenger of spring that will delicately fit into the home interior. For example, you can arrange several tulips in the corners of the posters.
Prepare the materials as follows:
- Thick double-sided paper.
- Cardboard template with a five-petal flower.
- A thick needle.
- Scissors.
- The wire.
- Green winding for the stem.
- Glue.
Do such large flowers of paper with your own hands, the master class described in detail below will help you with this.
There is nothing difficult to work with, just stick to this scheme:
- Circle flower patterns, cut.
- Wrap the wire with green material.
- Dampen the cut elements well to make them easier to bend.
- In the center of each part, pierce a hole, insert the wire there.
- Fasten the stem in the flower eyelet.
- Smear one of the petals with glue, fold them with a bud to make a tulip.
- Miss the remaining petals, complete the bud.
- Attach the leaves to the wire.
- Use a little tangled paper to make the elements look more natural.
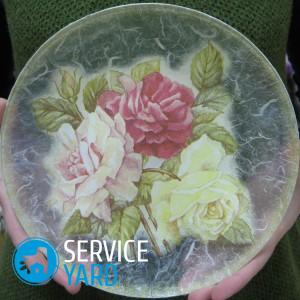
Large lilies
A fairly large lily can be easily made with scissors, paper and plates. You can also use colored paper or white paper. Such buds can decorate not only the wall in the apartment, but also the concert hall. Kids just love these products.
You must do the following:
- Take two plates with different radii. The larger one will be used to make the center, and the smaller one will be used for small petals.
- Put a sheet of paper in front of you, circle the large plate in the center.
- Fold the sheet in half six times.
- Circle one small petal with a small plate.
- Cut out all the workpieces.
- Repeat these steps three times to get three identical patterns for the flowers.
- Flex workpieces, just trying not to align much.
- Make an incision in the first color to the very center.
- On the second flower, cut one petal-triangle.
- Cut two triangle petals from the third flower.
- Bend each flower, shape the petals.
- Glue the workpieces from larger to smaller.
- Sew the bottom for stability, seal with a round base.

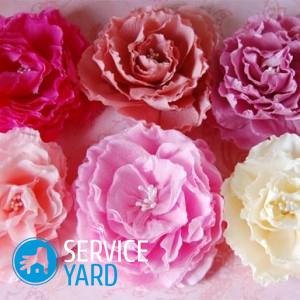
Beautiful camellias
Next, we will give another rather interesting master class on how to make voluminous flowers from paper with your own hands, schemes, patterns will help you cope with work faster. They can be attached to the wall in any room in the house - stylish, beautiful, delicate camellias will definitely find a good place for themselves. It is necessary for work to pick up several sheets of thick paper of the same color, which differ slightly in tone. Such paper is sold in art stores, you can find it among the tinted sheets for drawing.
You will also need:
- Yellow paper for the middle.
- Green paper for leaflets.
- Scissors.
- Glue gun.
- Cardboard.
- Wire.
Perform the production of camellias using this technology:
- On the cardboard, draw patterns with six petals. They should be slightly different in size so that a lush bud comes out.
- Circle the patterns, carefully cut.
- Scissor wrap each petal inward slightly.
- Glue with glue, laying on top of each other blanks.
- Cut out thin strips of yellow paper, and make a fringe along the edge.
- Fold the yellow paper with a tube, glue in the center of each blank.
- Cut the petals from green paper.
- Attach leaflets and buds to the wire.
to contents ↑Important! Paper is a universal material. From it you can make a variety of crafts, and some of them will serve as decoration of the interior, and some can be found quite practical application. Here are just a few ideas that might interest you:
How to make flowers from corrugated paper?
Corrugated paper is very fond of needlewomen, because it costs a lot, is sold in large rolls, and has an unusual structure. The flowers made from corrugated paper on the wall are incredibly airy and light. Creases and bends on the surface make crafts more natural.
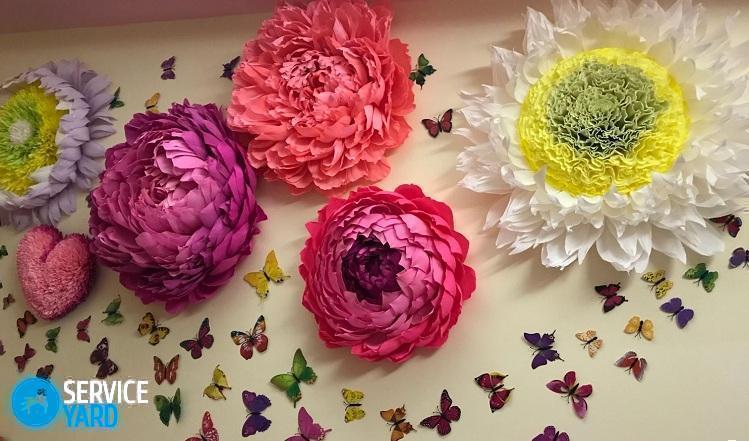
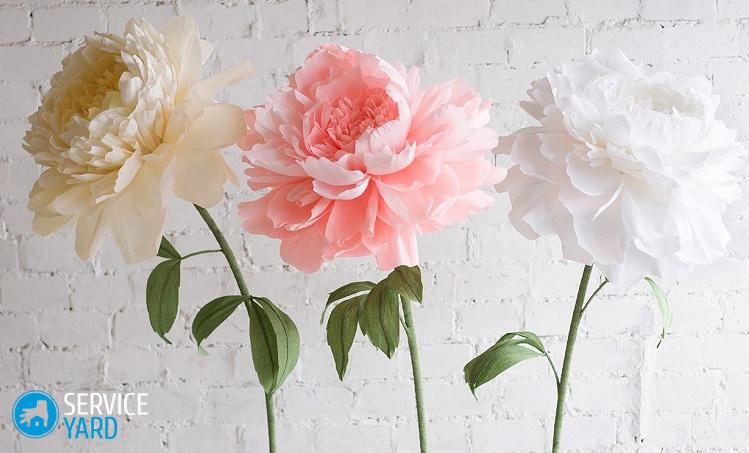
Corrugated Paper Peonies
Such voluminous plants can decorate not only the wall, but also any children's holiday. They themselves are quite bright, so it is better to combine them with a background of calm color.
Materials needed are:
- Multi-colored corrugated paper.
- Scissors.
- Wire.
Make peonies using the following scheme:
- Take a few shades of corrugated paper.
- Fold each color harmonica.
- Place the sheets in the order that you want to see as a result of the finished product.
- Do not touch the first accordion - this will be the edge, the last - make a few centimeters shorter.
- Make the edges of all paper rolls triangular to form the tips of the petals.
- Bend each roll in half, then determine the middle, mark it with a pencil.
- Roll the rolls, fold the middle to the middle.
- Pull the paper in the middle of the paper, bend it in different directions so that the petals open.
Stock footage
Now you have seen how many ideas for making homemade paper flowers exist. Each of them has its advantages, they are simple to perform, do not require the craftswomen to possess any special skills and purchase an expensive tool. Everything is extremely clear and simple, even a beginner can cope with any of the given master classes.
 (No ratings yet)