DIY induction boiler - drawings
Induction-type heating boilers have appeared on the market relatively recently, but have already been able to compete with conventional electrical appliances with a heating element. All other things being equal (dimensions, power consumption), induction boilers are able to warm up the heating system much faster. In addition, they work in low-quality coolant systems and do not require complicated maintenance. Knowledge of electrical engineering and ingenuity allow you to make an induction boiler yourself. The topic of today's article: do-it-yourself induction boiler - drawings, diagrams and installation ..
to contents ↑Operating principle
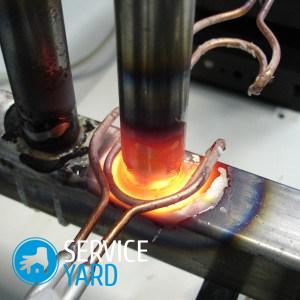
The action of the induction boiler is based on the ability of materials that conduct electric current to heat from eddy currents. They are created from electromagnetic induction:
- As an induction source, an alternating current of high frequency is used, which passes through the primary winding of the heating device. It is made in the form of a coil.
- The heating element located inside the coil serves as a secondary short-circuited winding.
- In a heating element, electromagnetic energy is converted into heat.
to contents ↑Important! The occurrence of eddy currents is also possible at an industrial current frequency of 50 Hz. However, the efficiency from heating will be small. In addition, the device will make a lot of noise and vibrate during operation. With an increase in the frequency of alternating current up to 10 kHz and more, heating intensifies, and noise and vibration, on the contrary, disappear.
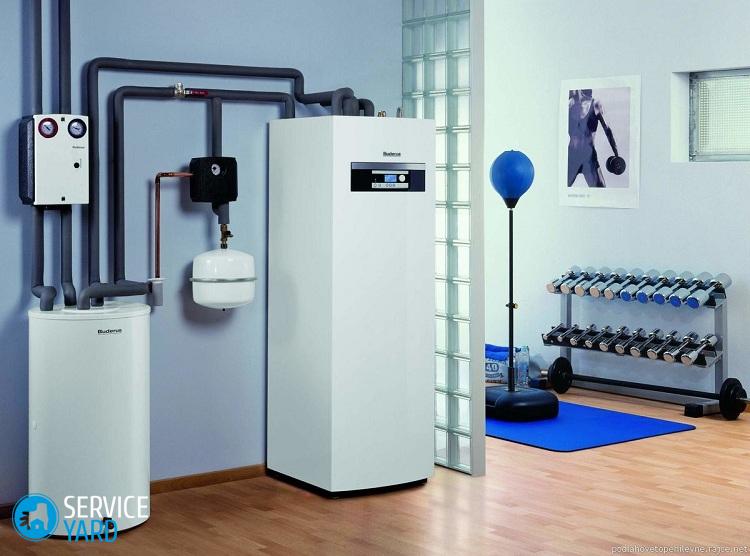
How is an industrial induction boiler arranged?
It is necessary to have an idea about the arrangement of such equipment, otherwise it is not possible to make an induction boiler with your own hands, draw up drawings and assemble the unit. So:
- An industrial induction boiler is based on a heat exchanger with a toroidal winding connected to a high-frequency converter.
- The current passing through the winding creates an alternating electric field that induces eddy currents passing through the heat exchanger.
- According to the signal coming from the control panel, the converter creates a current of the required frequency.
- Modern boiler models are automated. This allows not only to create the optimal mode of heating the coolant, but also to turn off the device in the event of an accident.
- The coolant is located inside the heat exchanger. Eddy currents heat it up to a predetermined temperature. Due to the temperature difference of the coolant at the inlet and outlet, it is continuously circulated. Not even a pump connection is required.
Important! Induction type boilers can be used in systems with both natural and forced circulation.
- As a coolant, you can use oil, antifreeze or antifreeze. The quality of the coolant does not matter.
- Vibration of the system that a person does not feel prevents the deposition of scale on the thermal circuit.
- As an outer shell, a metal housing is used, which is equipped with electrical and thermal insulation.
- The configuration of the boiler can be any. Since there is no tank inside the boiler, its dimensions are small and the mass is not more than 50 kg.
Important! Do not turn on the induction boiler if the system is not filled with coolant. This is fraught with overheating of the boiler and the failure of its elements.
to contents ↑Important! For those who spend a lot of time in the country, the lack of hot water can be a big problem. This issue can be resolved. Follow the link and learn how to do it. DIY boiler.
Benefits:
- High value of efficiency (95-98%).
- A wide range of models of different capacities, designed for a voltage of 220 or 380 V.
- Rapid heating of the heating system.
- Ability to work with different coolants.
- The tightness of the circuit along which the coolant passes. This completely eliminates leaks and malfunctions associated with them.
- Long work without scaling. It is the scum that decreases over time the efficiency of the boilers equipped with heating elements. For the same reason, the heating elements overheat, and the device fails.
- Long service life (25-30 years).
Important! There are also disadvantages, including high cost. This is an incentive for the independent manufacture of an induction boiler. Despite the complexity of induction processes, it is possible to create a device that is not inferior in its performance to industrial designs.
to contents ↑Important! Want your home design to be exclusive? Use the detailed instructions, drawings and diagrams, anddo it yourself furniture.
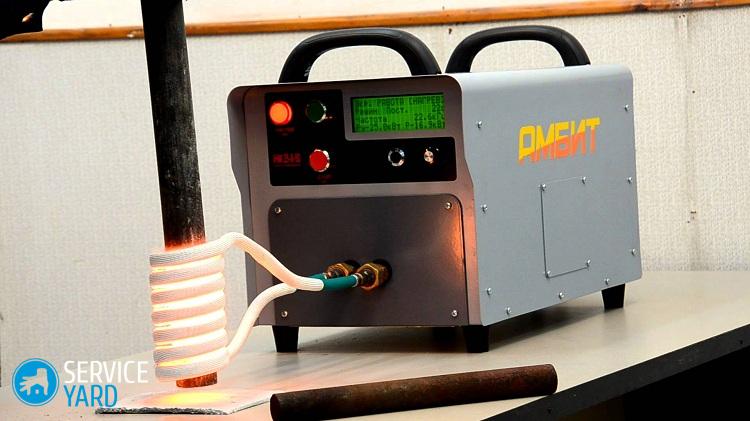
Welding Inverter Boiler
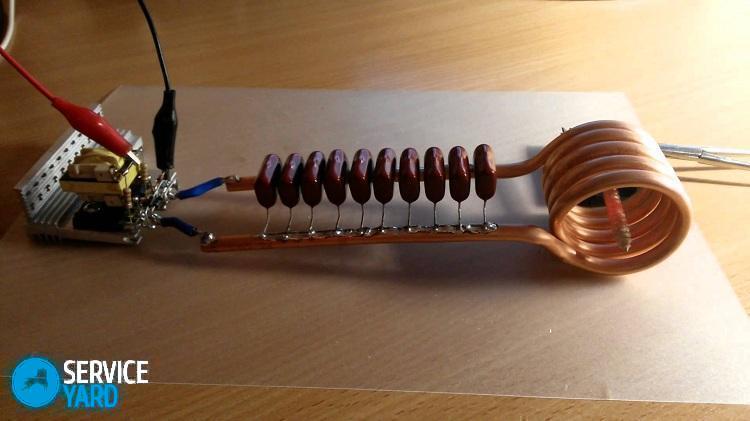
This is a fairly simple design. The most complex element of an induction boiler is a high-frequency converter. It is not easy to make an inverter for a heating boiler with your own hands. Its role is played well by a modern welding inverter, which is capable of delivering an output signal whose frequency is from 20 to 50 kHz. In addition, for installation you need:
- Copper wire in enamel insulation with a diameter of 1.0-1.5 mm.
- An insulated wire equipped with terminals to connect the winding to the inverter.
- Stainless steel wire scraps with a diameter of 3-5 mm, length 50 mm.
- Fine stainless steel mesh.
- A meter section of a polyethylene or polypropylene water pipe with a diameter of 50 mm and a wall thickness of 8.4 mm.
- Textolite for fixing the winding.
- Epoxy for insulation of the winding.
Important! The body of a home-made boiler can serve as a distribution cabinet made of metal or plastic. In the cabinet you can install an inverter and a heating element.
Important! Nowadays, housewives are less often engaged in conservation, resorting to freezing fruits for the winter. In a conventional refrigerator, it is impossible to place a large number of fruits. If the budget does not allow you to purchase a freezer, do it yourself. Our post will help you "How to make a freezer with your own hands?".
DIY assembly algorithm for the induction boiler - drawings and assembly procedure:
- Using epoxy glue, fix 4 textolite strips 8-10 mm wide on a piece of pipe. In this case, you need to step back from the ends of the pipe by 7-10 cm. A winding will be wound on these strips. To fix the extreme turns, make grooves in the PCB.
- Wind 50-100 turns of copper wire in insulation. The distance between the turns should be the same, approximately 0.3-0.6 mm.
Important! The number of turns depends on the specific resistance of the wire and its diameter, as well as the output characteristics of the inverter.
- When installing the boiler in a residential area, it is advisable to carry out a toroidal external winding in order to reduce the external electromagnetic field. The toroidal winding has the same number of counter-directed turns. Mutual compensation of electromagnetic flows occurs (they pass exclusively along the internal circuit).
- Insert the steel mesh into the pipe and tightly fill the pipe from the opposite end with pieces of stainless steel wire. Under the influence of eddy currents, the metal will heat up.
Important! It is advisable to use stainless steel in order to avoid metal corrosion. But in the absence of a stainless steel, an ordinary wire rod is also suitable.
- Solder both ends of the polypropylene adapter pipe section. Install ball valves on them to shut off water circulation.
- Install an emergency valve to relieve pressure from the outlet upper adapter. Insulate the winding with epoxy glue.
Important! When making epoxy glue, add 10-15% less hardener. Insulation will not be so fragile.
- Using crimp terminals, secure insulated wires to the winding leads. The other end of the wire must have terminals for connection to the inverter.
Important! The diameter of the wires must be selected so that it can withstand the highest output current of the inverter.
- Mount the heat exchanger in the cabinet on brackets made of heat-resistant material that does not conduct electric current. A good option is textolite.
- Connect the water heater to the system, fill it with coolant.
- Install the inverter at the bottom of the cabinet. Connect the terminals to it and plug it into the network. Start the boiler and set it to the optimal operating mode.
to contents ↑Important! Many men have a hair clipper at home. What to do if it is out of order or a new device appears? Lovers of tinkering with their own hands will give her a new life. We have prepared the best ideas in the article.“What can be done from a hair clipper?”.
How to make an induction boiler with your own hands from an induction cooker?
Disassemble the heating element and use the copper wire to wind it onto the heat exchanger. Use the tile control unit to power the winding by setting the desired power on the control panel.
However, this method has a number of disadvantages:
- The need for self-calculation of the inductance of a newly wound coil. Not the fact that it matches the original value. The device may fail.
- Most induction cookers are equipped with an automatic shutdown function after 2-3 hours of operation. This means that the boiler will shut off regularly.
- The power of the tiles, as a rule, does not exceed 2.5 kW. For this reason, using parts from the induction cooker, you can only make a low-power boiler.
There is an easier way to use the induction cooker without disassembling it: install a hermetically made stainless steel tank on the tile with inlet and outlet fittings and connect it to the heating system.
to contents ↑Important! Before everyone who bought a new refrigerator, a problem arises: where to put the old one? There is an article on our portal of useful tips that will help solve this issue. To do this, follow the link. "Old refrigerator".
Stock footage
With some knowledge in the field of electrical engineering, you can do the induction heating boiler with your own hands. The circuit and installation are not very complex.
 (No ratings yet)