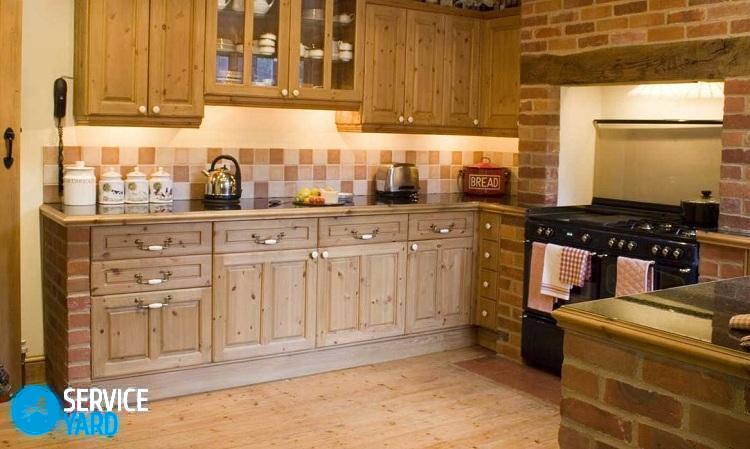
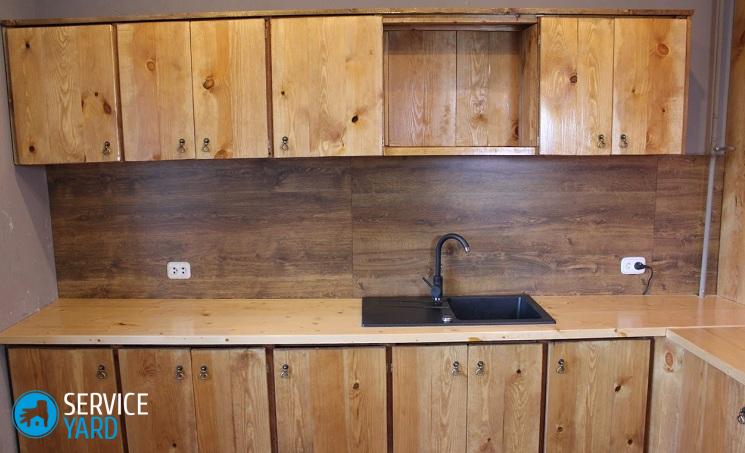
DIY kitchen
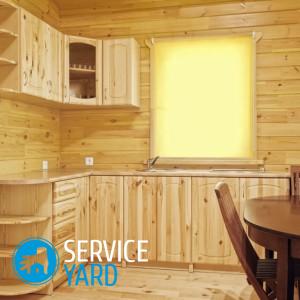
Any owner of an apartment or house wants to furnish the kitchen with practical and spectacular furniture. And many face the question: how to make the furniture fit perfectly into the interior, while being multifunctional? Any manufacturer today can offer a wide range of furniture for the kitchen. But not always buying a kitchen unit is affordable. A solution to this problem can be a kitchen set with your own hands. Assembling it is quite simple - with the right measurements and accurate calculations, such work is within the reach of anyone who has screwed a screw or sawed a board with their own hands at least once. Do not believe? Then read on.
to contents ↑Benefits
To reduce the cost of furniture for the kitchen, at least twice, and to get a result that will satisfy all your requirements, a kitchen set with your own hands can. Drawings and diagrams are quite simple. The main advantages of this solution are obvious:
- Independent work will be a great solution if your room has a non-standard shape.
- If you plan to purchase a lot of household appliances that need to be built into furniture.
- An individual approach to the manufacture of kitchen furniture with your own hands will give an individual result. None of your friends you will no longer see such furniture.
- After you create your headset from scratch, you will be 100 percent sure of its reliability, strength and durability, because the quality depends only on you.
The most common mistake of many beginners is to overestimate their own strengths. Therefore, creating a calculation of kitchen furniture with your own hands, do not plan the most “sophisticated” options, guided by your favorite picture from a design magazine, or even your own imagination. Consider your design and assembly skills. And take the advice of experienced craftsmen:
- The principle “the simpler, the more reliable” works great for beginners in the furniture business. Take classic rectilinear designs as a basis - they are easy to measure and assemble.
- A sign of professionalism in creating a kitchen set with your own hands is a well-understood symmetry in the arrangement of individual pieces of furniture and the design of facades.
- Even the simplest modular headset, fitted into the interior without gaps and protruding parts, looks beautiful and aesthetically pleasing. And the functionality will add the use of light in the performance of new products, such as cargo, organizers or boxes with exit systems.
- Separators, organizers that fit perfectly in the kitchen with their own hands, you can buy or make yourself.
to contents ↑Important! You can add a touch of “exclusivity” due to the original furniture facades, which usually come to the fore. You can completely make them yourself, order ready-made or decorate to your own taste.
Creating Drawings
DIY kitchen furniture requires the construction of drawings and diagrams. They should definitely include the width and height of the walls, the dimensions of the walls and window sills, in general, all the nuances that ultimately play an important role:
- At this stage, it is important to take a tape measure in several places, for example, at a height of 200 mm from the floor, at chest level and under the ceiling. This is due to the fact that slight deviations can be observed due to the curvature of the walls.
- As practice shows, the discrepancy between such measurements can be up to three to four centimeters. Using modern building materials, these discrepancies can be leveled. Therefore, grasp the tape measure when the old furniture is already dismantled and there is free access to the wall.
Layout of furniture in the kitchen
The drawings should reflect the shape of your future do-it-yourself kitchen furniture:
- Linear The furniture is located along the wall. In one or two rows. A very convenient form for rooms with a small area, as well as in narrow and long kitchens.
- Corner This arrangement allows you to place a little more furniture and equipment, since you can use the corner area or window sill. Precisely measuring the length of the walls and the desired height of the product will help you make the right-angled kitchen set drawing with your own hands. The L-shaped form of the kitchen will provide comfortable access and free movement.
- U-shaped. It is used in spacious rooms, having a dining area in the center of the room. Small-sized rooms are endowed with maximum functionality, the dining room in this case is organized in the living room.
- Island and peninsular. The stylish look of a kitchen set with your own hands is achieved thanks to the non-standard layout: a protruding work surface, a bar counter, or an island in the center of the room. Suitable for decorating a kitchen with a spacious area.
Communications
Do not forget, thinking over the work on creating kitchen furniture with your own hands, include in the drawings and diagrams the locations of the main communications, such as gas, water, wiring, batteries. In this case, it is worth considering the following nuances:
- The stove should be located at a distance of no more than two meters from the gas pipe.
- It is most logical to place the dishwasher and washing machine closest to the water supply and drainage system.
- The intersection of water, sewer and gas pipes is unacceptable. Water supply and sewerage can be laid in parallel, but the gas pipe should not go above, and even more so under them.
- Above, below and behind the gas pipe, no wiring should be outside or in the wall, including electrical communications.
- The outlet should be next to the refrigerator, so as not to pull extension cords and puzzle over where to hide the wires.
- And finally, from any edge of the stove to the nearest combustible or heat-sensitive object, for example, the same refrigerator, there should be at least 60 centimeters. It is possible to bring chipboard close to the plate, since this material is self-extinguishing.
Kitchen furniture details
When creating a kitchen set with your own hands, indicate on the drawings and diagrams where you will have cabinets, where it is better to make hinged shelves. Count and that moment, whether at opening doors will not rest against walls. It is also worth pre-deciding on the choice of material:
- Think about what the cabinet doors of the kitchen set will be like do-it-yourself. It all depends on you. They can be either opaque, glass or from a mirror. Why is it important? Because each of these materials has a certain thickness, which will need to be reflected in the drawing.
- Also, do not forget to include important information about where the dishwasher is located, and where you plan to install the oven, in the do-it-yourself kitchen appliance diagram.
Important! The space for household appliances is regulated by certain sizes, the cabinet for the same hob should not be wider than 60 centimeters.
- Do-it-yourselfers also have their own generally accepted standards for the lower drawers of kitchen furniture. They should be no higher than 85 cm. This rule also applies to the work surface on which you will cook food.
Important! Please note that this parameter already includes the thickness of the countertop and the height of the legs.
- Cabinets in which you will store dishes, products, kitchen utensils can be absolutely anything. But the values are better to round. For example, not 35, but 30 or 40 centimeters.The main thing is that they harmoniously fit into the general concept of a kitchen set with your own hands.
- Do not forget to include a work surface in the scheme, maybe even not one. It is usually made on the same level as the lower drawers.
Small kitchen and furniture in it
If you are the owner of a small apartment, then do-it-yourself furniture for the kitchen should not be cumbersome, it will visually “steal” the space. Your task is to create additional storage spaces using the headset:
- If your kitchen barely allows you to turn around, then use a windowsill. On it you can equip a work surface or use it under the dining table. And in the space under the window opening, if the thickness of the walls allows, you can mount a cabinet and use it to store preservation.
- A small room can also be expanded with cabinets. When making kitchen furniture with your own hands, even at the planning stage, make them a little narrower, minus from the values of 10-20 centimeters. As a result, you will get more space for movement, and the headset will look less bulky.
- Another proven option over the years to save space. Make the lower cabinet doors sliding and not swinging open.
to contents ↑Important! Special computer programs will help you make calculations and choose the optimal dimensions for the individual elements of the kitchen set with your own hands. With their help, you can design furniture and create a design for every taste.
Materials
The next preparatory stage in the manufacture of kitchen furniture with your own hands is the selection of the appropriate material. And here everything will depend only on your financial capabilities and wishes:
- Array of wood. This material is the most expensive, in working with it you need accuracy and skill. But then it is considered the most durable and durable.
- Painted MDF. It has long earned popularity due to its excellent performance. Affordable price is another advantage.
- DIY kitchen from chipboard is perhaps the most suitable option for beginners. This material is one of the cheapest, easy to use.
- Postforming. Postforming plates are a wear-resistant and practical material. What is most interesting, you can choose any color and texture of the surface.
- Particleboard without coating. It is used for the manufacture of individual elements of a kitchen set with your own hands, for example, for the sidewall and back wall.
to contents ↑Important! The material you choose for a kitchen set with your own hands can be a raw material, from which in the future you yourself will make the necessary blanks. But this will require industrial woodworking equipment. Or you can simplify your task by ordering walls, doors and other parts of the dimensions you need in production.
Training
When all the materials for the kitchen set do it yourself at home, do not rush to proceed with the assembly. Before her there is a very important stage that you should not skip - this is the edging:
- This key trim element protects the edge of the material from moisture, chemicals and other liquids.
- Edging allows you to create reliable protection against chips and other damage.
The material for edging a kitchen set with your own hands is of different types. But if it comes to practicality and durability, it is better to use a plastic edge. It is better to store it in a dry place until installation. On the reverse side, the edge is treated with a special adhesive that is sensitive to temperature. Therefore, it is glued using a conventional iron, pre-treating the surface with sandpaper:
- First of all, set the thermostat on the iron to medium mode.
- Put the workpiece horizontally on the table, face up. Next - with a margin of two to three centimeters, cut the edge and attach it to the end.
- Roll the first piece of fabric several times. Through it you should heat the edge.This technique will prevent overheating of the material and prevent its damage. Accordingly - the iron will be protected from accidental contact with glue on its sole, and the edge of your kitchen set with your own hands will look very neat.
- It takes several seconds to heat up. After heating, press the edge with another piece of cloth, you just have to wait for it to cool.
- After gluing, cut off the protruding residues with a clerical knife.
to contents ↑Important! Professionals in the manufacture of kitchen furniture with their own hands recommend hemming not only those parts of the set that are in sight, but also those that are hidden from view. This will protect any material from moisture, which is much more in the kitchen than in any other room.
Assembly of furniture for the kitchen
At the next stage of making kitchen furniture with your own hands, you have to arm yourself with a marker, a screwdriver and a drill. Remember that there is no rush to this work, do everything in stages and carefully:
- When assembling cabinets for a kitchen set with your own hands, difficulties should not arise. In fact, this is the most ordinary box. Attach the side parts to the main horizontal strips, then install the upper part on this base.
- In order for the guides on the rollers to be perfectly even, we fix them according to the construction level. Make sure that they are strictly horizontal and parallel to each other. Otherwise, each time you will face the problem of easily pulling out your drawers.
- When your do-it-yourself kitchen cabinet is fully assembled, attach the legs to it. This part is best screwed on, turning the furniture upside down.
- After the main components of your future kitchen furniture are assembled with your own hands, it is time to do the facades. To facilitate this stage, the finished cabinet is laid on the floor and the assistant is called, since the doors of the kitchen set must be screwed in the open position with your own hands, and it is impossible to carry out such an installation alone. Therefore, one person fixes the door at an angle of 95 degrees, the second makes markings for fasteners. Then install the necessary fittings, and the door can be installed in its rightful position.
- The last touch of a kitchen set with your own hands is the fastening of handles and other accessories. Immediately fill the assembled cabinet with drawers, shelves, nets.

If you are doing the assembly of a kitchen set with your own hands after a major overhaul, then first complete all work on puttying, leveling the walls and wallpapering. When the walls and floor are clean of building dust and dirt, let them dry and only then proceed with installation:
- Do-it-yourself installation of a kitchen set should begin with the extreme module. When assembling the bottom row, be sure to use the building level.
Important! Please note that the walls and floor in any apartment can be far from ideal, and all these differences will be visible after installation at the joints of the working surfaces.
- Do-it-yourself countertop of the kitchen set on the cabinets using the most ordinary self-tapping screws.
- Do not forget about the stove and the sink. Use a regular pencil to draw a slightly noticeable shape. Well then use a jigsaw.
Important! Be careful in your work so that subsequently the edge of the countertop fits snugly against the sink and moisture does not get inside the structure.
- After the lower part of the kitchen set with your own hands is finished, it's time to start assembling the upper. Here, consider one nuance, and experienced masters already know about it. To make it convenient for housewives and owners to open the cabinet, get out the necessary kitchen utensils, and simply constantly cook without resting their forehead on the cabinets, it is necessary to maintain a certain distance between the top and bottom - at least 650 millimeters.
Important! If you add the height of the upper part to the generally accepted distance value and minus 6-7 centimeters, you will get the perfect mark for mounting the mounting rail.
- Fix the universal canopy to the back wall. Do-it-yourself kitchen cabinets with your own hands hang on the wall, aligning vertically and horizontally.
- If a hood installation is planned for your furniture, attach it last.
- Before proceeding with the installation and fastening of the sink, also process the lower part using the same silicone sealant. This will prevent water from entering the sink.
Transformation of the old headset
If you have not yet decided on such a difficult job, then just try to transform a kitchen set with your own hands at home without complicated calculations, drawings and work. To do this is quite simple, it is enough to purchase paint or self-adhesive, take the most ordinary tools and follow the following instructions:
- Disassemble your kitchen set into components - remove the doors and facades. Then use sandpaper to clean the surface and treat it with an antiseptic.
- If any elements are already so worn out that you can’t even look at them without tears, replace them. You should not reanimate accessories that have long served their term.
- Re-paint all the facades or glue them with film, observing all the rules necessary when working with these materials.
- Reinstall all removed parts and admire the result of work.
to contents ↑Important! You can add novelty to your kitchen furniture at home with the help of decoration or decoupage. This work is quite simple and will only require you to turn on your imagination and be careful when doing work.
Stock footage
As you can see, the successful manufacture of kitchen furniture with your own hands is within the power of even a novice master. Just do not neglect the advice of professionals - at the initial stage, perform all the calculations, draw up a detailed drawing, prepare all the necessary tools and materials. And you can safely proceed to the realization of your plans. Do it yourself, with soul, such furniture will serve faithfully for more than a year, because it is not for nothing that they say that if you want to do something well, do it yourself!
 (No ratings yet)