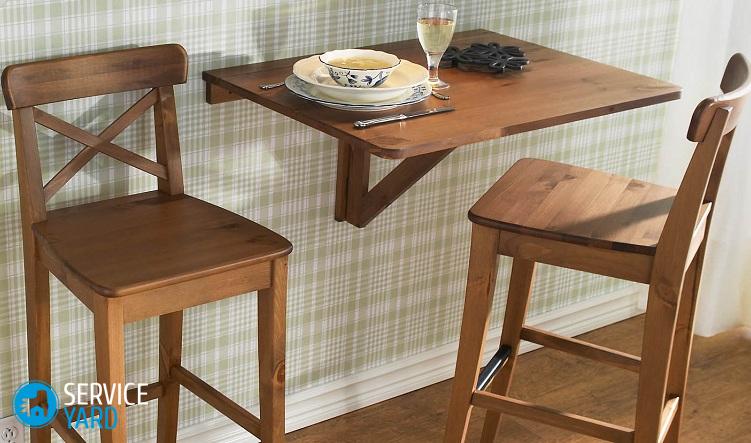
DIY kitchen chairs

Any person entering the kitchen immediately pays attention to the table and chairs. This is an integral attribute of any kitchen, without them it would not be so convenient and cozy. We have a meal at the table, and we are sitting on a chair. Such furniture can be bought at the store, but even the most ordinary wooden products will cost you, alas, not cheap. Today we suggest you make your own kitchen chairs. In this way, you will not only significantly save your finances, but also delight the household and guests of your home with original furniture. In our article, we will consider the simplest and most affordable ways to make homemade chairs.
to contents ↑DIY kitchen chair
Due to the fact that the kitchen chair should be, first of all, comfortable, we suggest you make it with a soft seat. To manufacture such a product you do not need special knowledge in the carpentry. So, let's get started.
Work stages
The whole process can be divided into the following steps:
- The choice of materials.
- Drawing up drawings of the chair with a detailed description of the details, taking into account their number and size.
- The acquisition of materials and necessary tools.
- The manufacture of the frame.
- Assembly of the base.
- Making a soft seat and connecting it to a wooden frame.
Materials and tools:
- Wood, particleboard, MDF for the foundation.
- Upholstery fabric (jacquard, flock and others).
- Foam rubber 50 mm thick (you can take a synthetic winterizer, batting, latex).
- Bars.
- Plane.
- Chisels.
- Wood hacksaw.
- Mallet.
- Jointer.
- Sandpaper No. 125.
- Sandpaper No. 83.
- Construction stapler with staples.
- Jigsaw.
- Drill.
- Crafting table.
- Self-tapping screws.
- Screwdriver.
- Joiner's glue.
- Furniture lacquer.
- A simple pencil.
It is better to make tables and chairs with your own hands from natural wood. Pine, alder or larch is perfect for this. These materials have good resistance to moisture and other external influences. Alder kitchen furniture is an option for those who want to save some money.
Important! For the manufacture of tables and chairs, you can use other types of wood: oak, beech, mahogany. The only thing to consider is that they are difficult to handle at home. As a result, oak furniture is very heavy, which is not quite suitable for daily carrying chairs.
Manufacture:
- We saw the timber into two 4x4 parts 45 cm long for the front legs.
- We saw the timber into two pieces 4x6 82 cm long for the rear legs.
- We make two recesses on two sides in the prepared bars.
- We saw off four parts 35 cm long from a 4x4 timber. We saw centimeter spikes at the end of each workpiece. We make sure that they fit snugly into the grooves of the previously made recesses.
- We saw off a few more wooden pieces 42 cm long from a 4x4 timber. We cut suitable spikes on them.
- We take in our hands an edged board measuring 10x42 cm, which will be the back of our chair.
- We make recesses on the inner two sides for the rear legs. We insert a back in them.
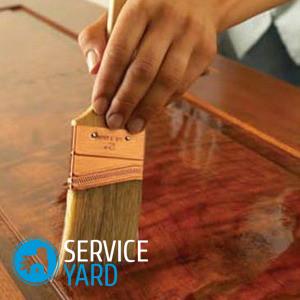
- We cover the entire structure with furniture varnish. We give time for it to dry.
- Now we collect the entire chair in a single product. We coat the spikes with wood glue, and then fix them. We fasten the back and seat with self-tapping screws (you can use bolts and nuts).
- Cut out the desired shape of the foam seat.
- Tighten the still “bare” seat with the selected filler.
- Cut a piece suitable for the seat from the upholstery fabric, and then fix it to the bottom of the base with a construction stapler.
to contents ↑Important! You can decorate such a chair in different ways: by burning, wood carving or decoupage.
DIY kitchen chairs made of wood and metal
Now we will consider a simple way to make a wooden chair with metal legs.
Materials and tools:
- Steel square pipes.
- Wooden cloth for the seat (you can take any other suitable material).
- Plastic plug for square pipes.
- Primer for metal.
- Paint for metal.
- Putty for metal.
- Joiner's glue.
- Beeswax.
- Screws
- Drill.
- Bulgarian.
- Welding.
- Protective mask.
- Screwdriver.
- Hammer.
- Coarse and fine sandpaper.
- Putty knife.
- Clamps.
- Jigsaw.
Work Stages:
- Before manufacturing blanks, we determine the dimensions of our future product.
Important! The chair should fit your weight and height so that you can feel as comfortable as possible.
- Now cut the workpiece. We got four metal long legs, four lower struts and the same number of upper struts. The most difficult thing here is to correctly measure and cut off the corners of square pipes.
Important! If you did not get very accurate cuts, then this is not critical, since then they are cleaned, processed with putty, painted, and blemishes will not be visible at all.
- If the pipes have rust and other impurities, we clean it.
- Fold the four square pipes together so that we get the letter A.
- Now we take welding, carefully weld the workpieces. Follow the most important rule - do not rush to get an even chair at the exit. Check the strength of the metal legs.
- We clean welds with a grinder. We make them smooth, aligning one level with the pipes.
Important! Such work can be done manually without special tools, taking for this file and sandpaper.
- We drill holes for fastening in the upper four pipes. We chose holes with a diameter of 4 mm so that we can securely fix the wooden seat with screws or screws. The best option is 8 screws, that is, two elements in each pipe.
- We use putty to hide possible defects after welding. We apply it in a small amount on the seams, give time to dry. We grind with sandpaper previously putty places. Now we have one solid metal frame.
- We put the product on the floor and check the resistance of the legs. Due to different sizes, they swing a little on a flat surface, so we first mark the places of the slices, make a cut, and then process the edges.
- We hammer the plastic plugs to the bottom of the square pipes so that the legs do not scratch the floor during the use of the product.
- Before painting, we clean the remaining dirt and dust on the legs well, and then wipe the frame with a cloth moistened with acetone.
- Now paint the metal (you can use a primer). For this we chose a neutral black color. We apply varnish on a metal frame so that our chair acquires a special shine. We give time to dry.
- For the base we take the pine panel, which we cut into pieces of size 30x30. We glue two wooden sheets with wood glue to give greater strength to the product.
- After the glue has dried, we cut out the circle using an electric jigsaw, which was previously drawn on a square blank.
- We pass to the grinding stage. First we use coarse grit sandpaper, and then go on to fine. So we got the smoothest seat surface for the chair.
- We coat the wood with varnish on wood with the addition of beeswax, wait for drying. We polish the seat with a dry cloth to create shine.
- We begin to collect the chair. We glue the wooden round seat to the steel frame using self-tapping screws or screws.Remember to drill holes when using screws.
to contents ↑Important! Most often, wooden furniture is varnished, which has a sharp and unpleasant odor. That is why we strongly recommend that you open the windows during and after work in order to make tables and chairs with your own hands from wood without harming your own body.
Stock footage
Now you can easily make a chair for the kitchen with your own hands. The most important rule that beginners need to consider is to start working with simple models so that you can then take on more complicated furniture. Good luck!
 (No ratings yet)