DIY leather weaving

Nowadays, it is becoming more and more popular to decorate your hands with bracelets, and the body with handmade belts and belts. The most common in this regard are leather products. Weaving leather with our own hands seems to many an incomprehensible art, and products made in this technique attract with its elegance and unusual appearance. This type of needlework has its roots in antiquity, and few people risk competing with the masters in such skill. In fact, everything is much simpler than it seems to many, and guided by one of the workshops listed below, you can make baubles of leather with your own hands without resorting to the master.
to contents ↑Preparation for work
Any creative process begins with preparation.
Measurements
In order to make a product, you need to know its exact length, for this:
- Take a tight thread or cord so that it does not stretch, wrap around the place where the product will be.
- Add a small allowance - for a bracelet it is approximately 1 cm.
- Unroll the rope on the ruler and mark the length of the product.
Important! If this is a belt, add the necessary allowances for the hanging ends, if any.
We are preparing materials
The first and most important step in this art is the preparation of the material. In order for the result of your work to exceed all expectations, you need to carefully process the materials. Here is a step-by-step guide for this:
- The first step is to choose the thing that you want to use as material for your creativity. This product must be made of genuine leather, otherwise - you will not achieve the desired result.
- Check for brittle skin. To do this, make a little effort and look. If the material breaks or cracks, it is not suitable for your work.
- Now put the item at the seams and set aside heavily frayed and damaged areas.
- Next, wash the fragments that you received in washing powder at a temperature not exceeding 35 degrees. Rinse and wrap in a piece of dry, natural cloth to remove moisture.
- Stretch the skin on the board using small nails and a hammer.
Important! Make sure that the material is pulled equally in all directions.
- Also carry all the decorative elements and a lock that you will need for work.
Having completed all these steps and letting your workpieces dry completely, you can get to work. There are many instructions and options for making leather jewelry. The most elegant and common you will see in our article.
to contents ↑Single puzzle
Weaving leather with your own hands is a very exciting experience, because you can weave a variety of patterns. One such product is the intriguing single puzzle. Consider the step by step instructions for weaving.
Step 1
To make the product look neat, take a strip of leather about 3 cm wide. Define the length as the measured length of the adjacent part of the product plus another 1.5 lengths.
Important! As weaving takes place, the skin will shrink, so the increase in length will not be superfluous. But do not overdo it, because too much allowance will only harm the work.
Step 2
Now take the prepared strip and make two parallel cuts along its length, dividing it into 3 even strips. At the same time, the edges of the strip should remain intact about 1.5-2 cm long.
Important! Make sure that both cuts are equidistant from the edges and from each other.
Number in your mind these cords from left to right: 1, 2, 3.
Step 3:
- Fix one end of the workpiece to the work surface. To do this, you can use a thin nail.
- Now let's get to work. Pull the workpiece by its lower end and pass it from top to bottom between strips number 2 and 3.
- Bring the tip to its original position.
Important! Do not look at the fact that the cords are twisted, this will simplify the weaving process.
Step 4
Now that all the preparatory processes are complete, follow the algorithm:
- In the upper part of your braid 1, wind the cord from above by 2 and then wind it between 2 and 3. As a result, it should fit under the cord with number 3. Such manipulations resemble the weaving of an ordinary pigtail.
- Next, throw the cord 3 through 1, then transfer the second through the top 3.
- Now you have some distance between the second and 3th cord. Pull on the tip of your product, then - pull it between 2 and 3 cord. The first stage of production is ready.
- Repeat all the steps before this step to obtain the desired braid density on the product.
to contents ↑Important! Do not forget to loop at the end of the weave between the 2nd and 3rd cord.
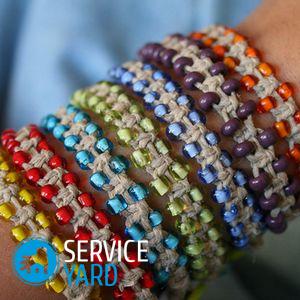
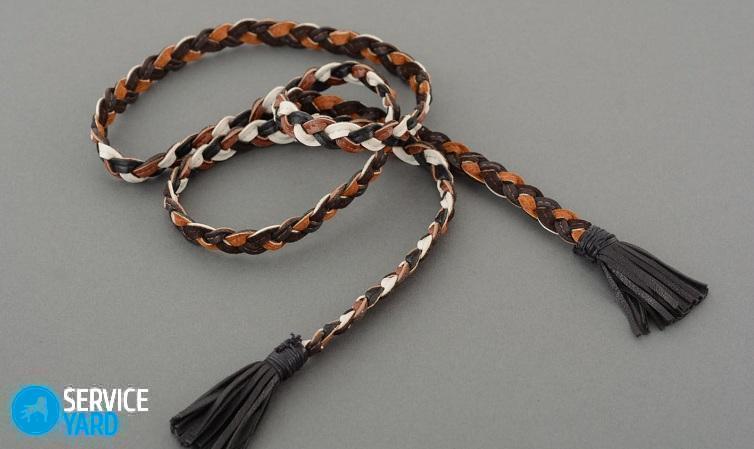
Circular braid
Another entertaining weaving of leather with your own hands is called a “circular braid”. In order to complete this technique, follow the instructions:
- Cut 4 equal cords about 1.5 times the length of the intended one. This technique also shrinks the skin. The thickness of the cords is recommended 5-7 mm.
- Tie the ends of the cords on one side with thread.
- Denote them A, B, C, D from left to right.
- Lock the product, as in the first method.
Important! For weaving, it is recommended that you take cords of different colors for the first time or mark them with different threads. This will not confuse.
- Route cord D over B and C.
- Now start B on top of D in the same way.
- Now draw A to the right on top of B and D. At the moment, the order of the cords B, D, A, C.
- We twist D over A to the right.
- Next, wind the cord C over D and A to the left.
- Now weave A over C.
- Turn B to the right through A and C.
- At the end, draw C over B to the right. We get the original order. On this, the first weaving cycle ends.
- Repeat steps 5-12 until the cords end.
- After the braiding manipulations are completed, tie the ends of the cords and decorate them with clasps at your discretion.
Bright bracelet or harness ready!
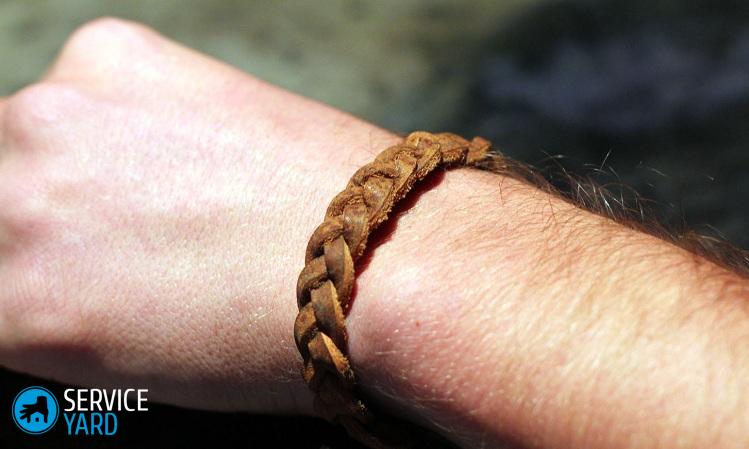
to contents ↑Girl's braid
This type of product is distinguished by its ease of manufacture. In order to make a simple accessory, you will need to adhere to the following instructions:
- Cut 3 cords of the same width.
Important! Length does not really play a role here, but the longer, the better. For a bracelet, the optimal number is 20 cm.
- Tie these strips from one end and fix on the work surface.
- Now weave an ordinary braid that was braided on your hair more than once in childhood.
- At the end of weaving, tie the ends together.
to contents ↑Important! If the product will be large in length, do not be afraid to fix it on the mark of the desired length and cut off the excess.
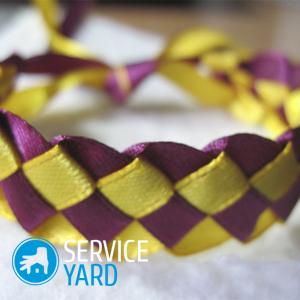
More braids
There are many different braids that can be transferred to bracelets. Do-it-yourself leather weaving includes weaving braids of 3, 4, 5, 6, 7 and even 8 cords, and they all look beautiful, natural and elegant. Here are some more unusual ways to braid leather.
Method 1
This manufacturing method also uses 3 cords of the same length, preparation for work is the same as for the “girl’s braid”. But the weaving method itself is slightly different from the above. Follow the instructions:
- Cross the left strand with the middle and right on top of the last two.
- Now stretch the former middle strand under the right one, after - throw it over the former left one.
- Repeat until the end of weaving - you will get a very unusual leather braid.
Fasten the bottom of the product, and you're done!
Method 2
Your product will take a very unusual look if you use this method of weaving your own skin. For such a product, it is necessary to take 5 strips of material, fix from parallel to each other on the working surface. For convenience, the operation algorithm is numbered by their numbers from 1 to 5 from left to right.
Let's get to work:
- We extend cord 1 above 2 and under 3 cords, after which 5 we extend over 4 to the right and under 3 and 1 at the place of their crossing.
- Then we stretch the 4th strip under 1 and above 3. At this stage, the numbering is as follows 2, 5, 4, 3, 1.
- We perform similar actions with strip number 2. We stretch it under 5 over 4 and 3.
Important! It is worth noting that in this braid the average braid does not move, and the rest entangles it.
- Now we take the rightmost lane - it is at number 1, start it over 2 lane at 3.
- We perform a similar action with 5 cord. We stretch it over 4 and 1 strip under 3. As a result, it has the following order of bands: 4, 1, 3, 5, 2.
- Now we spend the 2nd cord under 5 over 3, and 4 under 1 over 2 and 3.
- At this step, our first stage ends, all the bands returned to their original positions. Next, you need to repeat steps 1-6 until the end of the product length.
- When work is completed, work on the edges of the product.
Method 3
In this method, we will talk about how to implement weaving from the skin with your own hands using 7 threads of skin. As usual, we describe the algorithm by numbering the threads from left to right:
- Head the first lane over 2 under 3 and 4 from left to right.
- Next, we draw the 7 cord over 6 under 5 and 1.
- Now we spend 2 similarly to 1. We weave it over 3 under 4 and 7.
- The sixth weave over 5 under 1 and 2.
- Actions are similarly repeated throughout the work.
- At the end of the work, the edges of the product are fixed.
to contents ↑Important! The appearance of such a braid is very unusual, because it comes out double.
Leather Baubles
In addition to the original braids and other braids, there are also baubles made of leather with your own hands. How to weave this - talk below.
For such an unusual bracelet, we need 2 pieces of leather of different colors, preferably not very tough. We make 2 ribbons of them 7 mm wide and 50-60 cm long. We bind these 2 ribbons together, fix them on the working surface and proceed to weaving the product:
- We take the tape, which is located below, fold a small loop from it immediately after the place of binding of the tapes to each other.
- Now gently wrap this loop with the second tape.
- We fold the loop from the tape that was on top, we pass the lower loop, also folded into it, into it.
- These steps are alternated until the required bauble length is obtained.
We process the edges of the product
Weaving leather with our own hands implies not only the ability to mix beautifully stripes of leather between each other, but also the ability to correctly complete the work. And the final stage of any product will be its fastener.
The most common method of processing the edges of the product are metal clamps. They can be purchased at any sewing store, they have the most diverse appearance - from flat to round, they cost a penny.
Important! This type of processing does not just look neat, but also gives the product a more expensive, presentable appearance.
In order to fix a similar option on the material, a lot of skill is not needed:
- You will need pliers and neatness.
- In order to fix the clamp on the product, you need to carefully push the edges of the product into the middle of the clamp.
- After - squeeze well with pliers.
to contents ↑Important! Clasps can be very diverse - from carabiners to magnets and ordinary fasteners, which we have long been accustomed to. Also an interesting option would be to use a decorative cord inserted inside the clamp rings and a tightening bracelet around the arm.
Stock footage
There are many different options for how to weave jewelry out of leather, and life will not be enough to describe all of them. Use our instructions, experiment, develop, and you can easily comprehend such art as weaving from your own skin.
 (No ratings yet)